Creating your video library
With Library, you can add videos to your Time2book profile and make them available to clients. Videos can be free for everyone or available only to clients with an active pricing plan.
Before creating paid videos, first create a pricing plan:
Step 1: Open Library
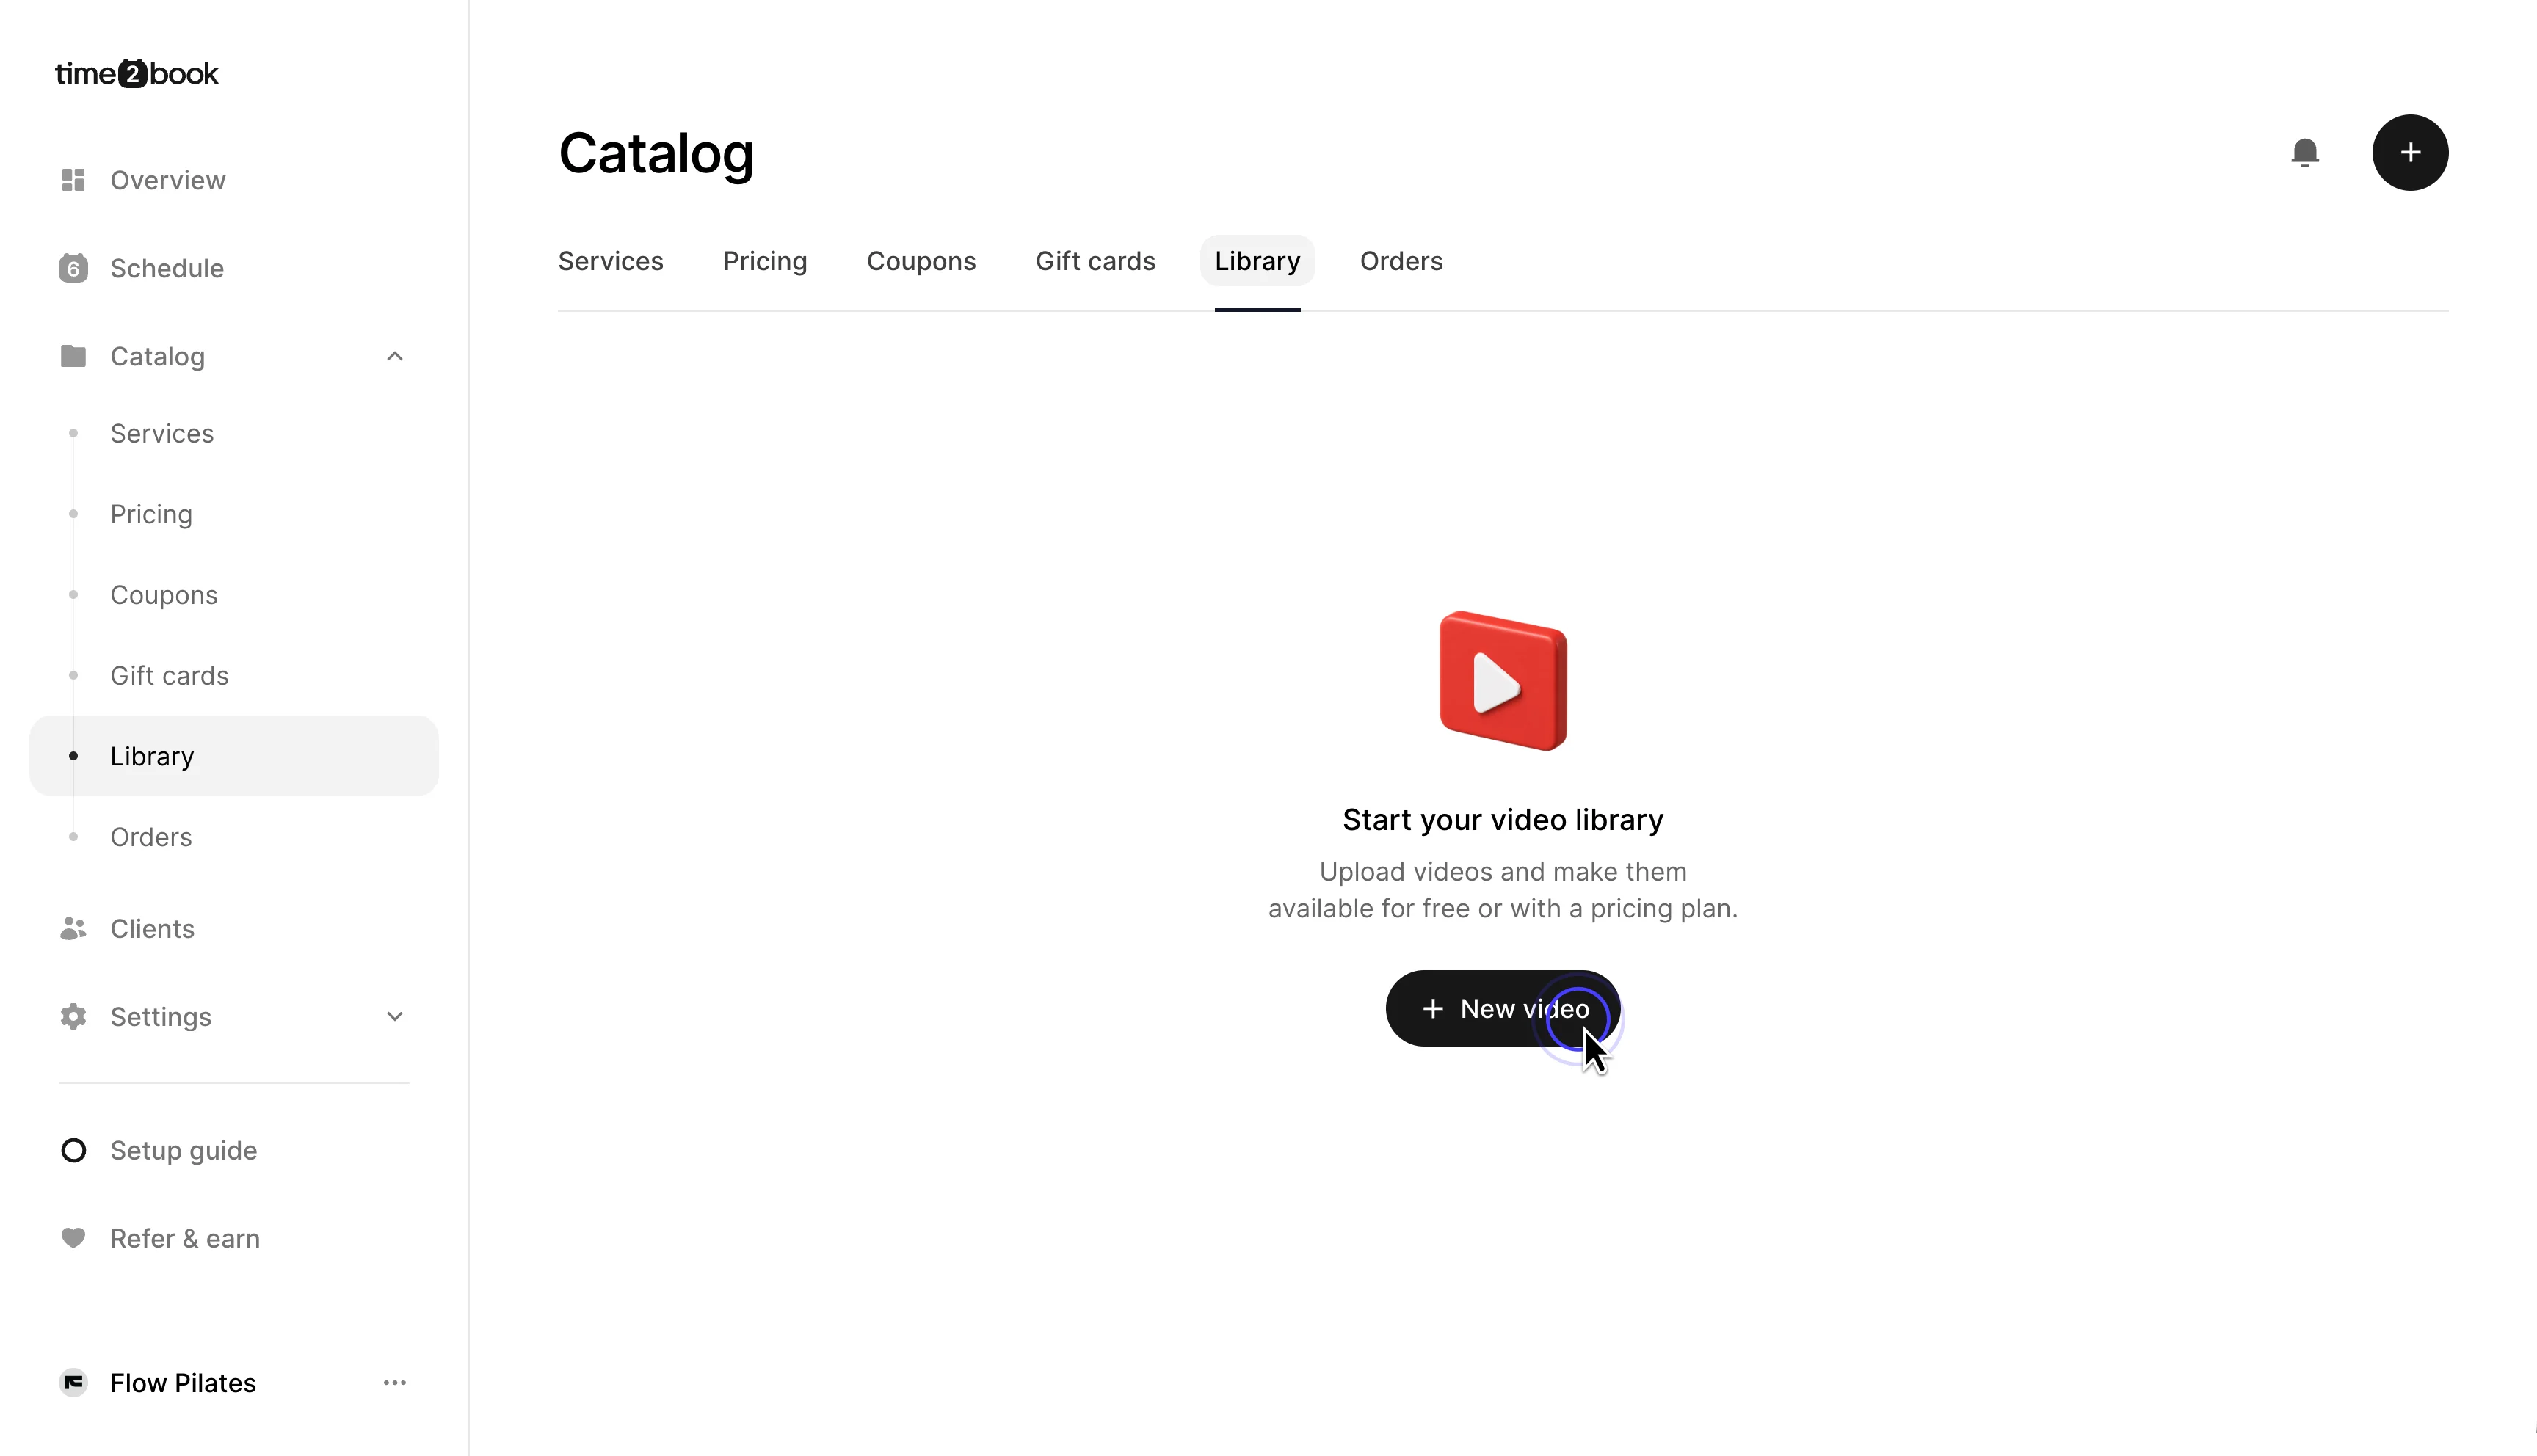
From the left-hand menu, go to Catalog → Library. If this is your first video, click New video in the empty state. You can also click the + button in the top-right corner.
Step 2: Add video details
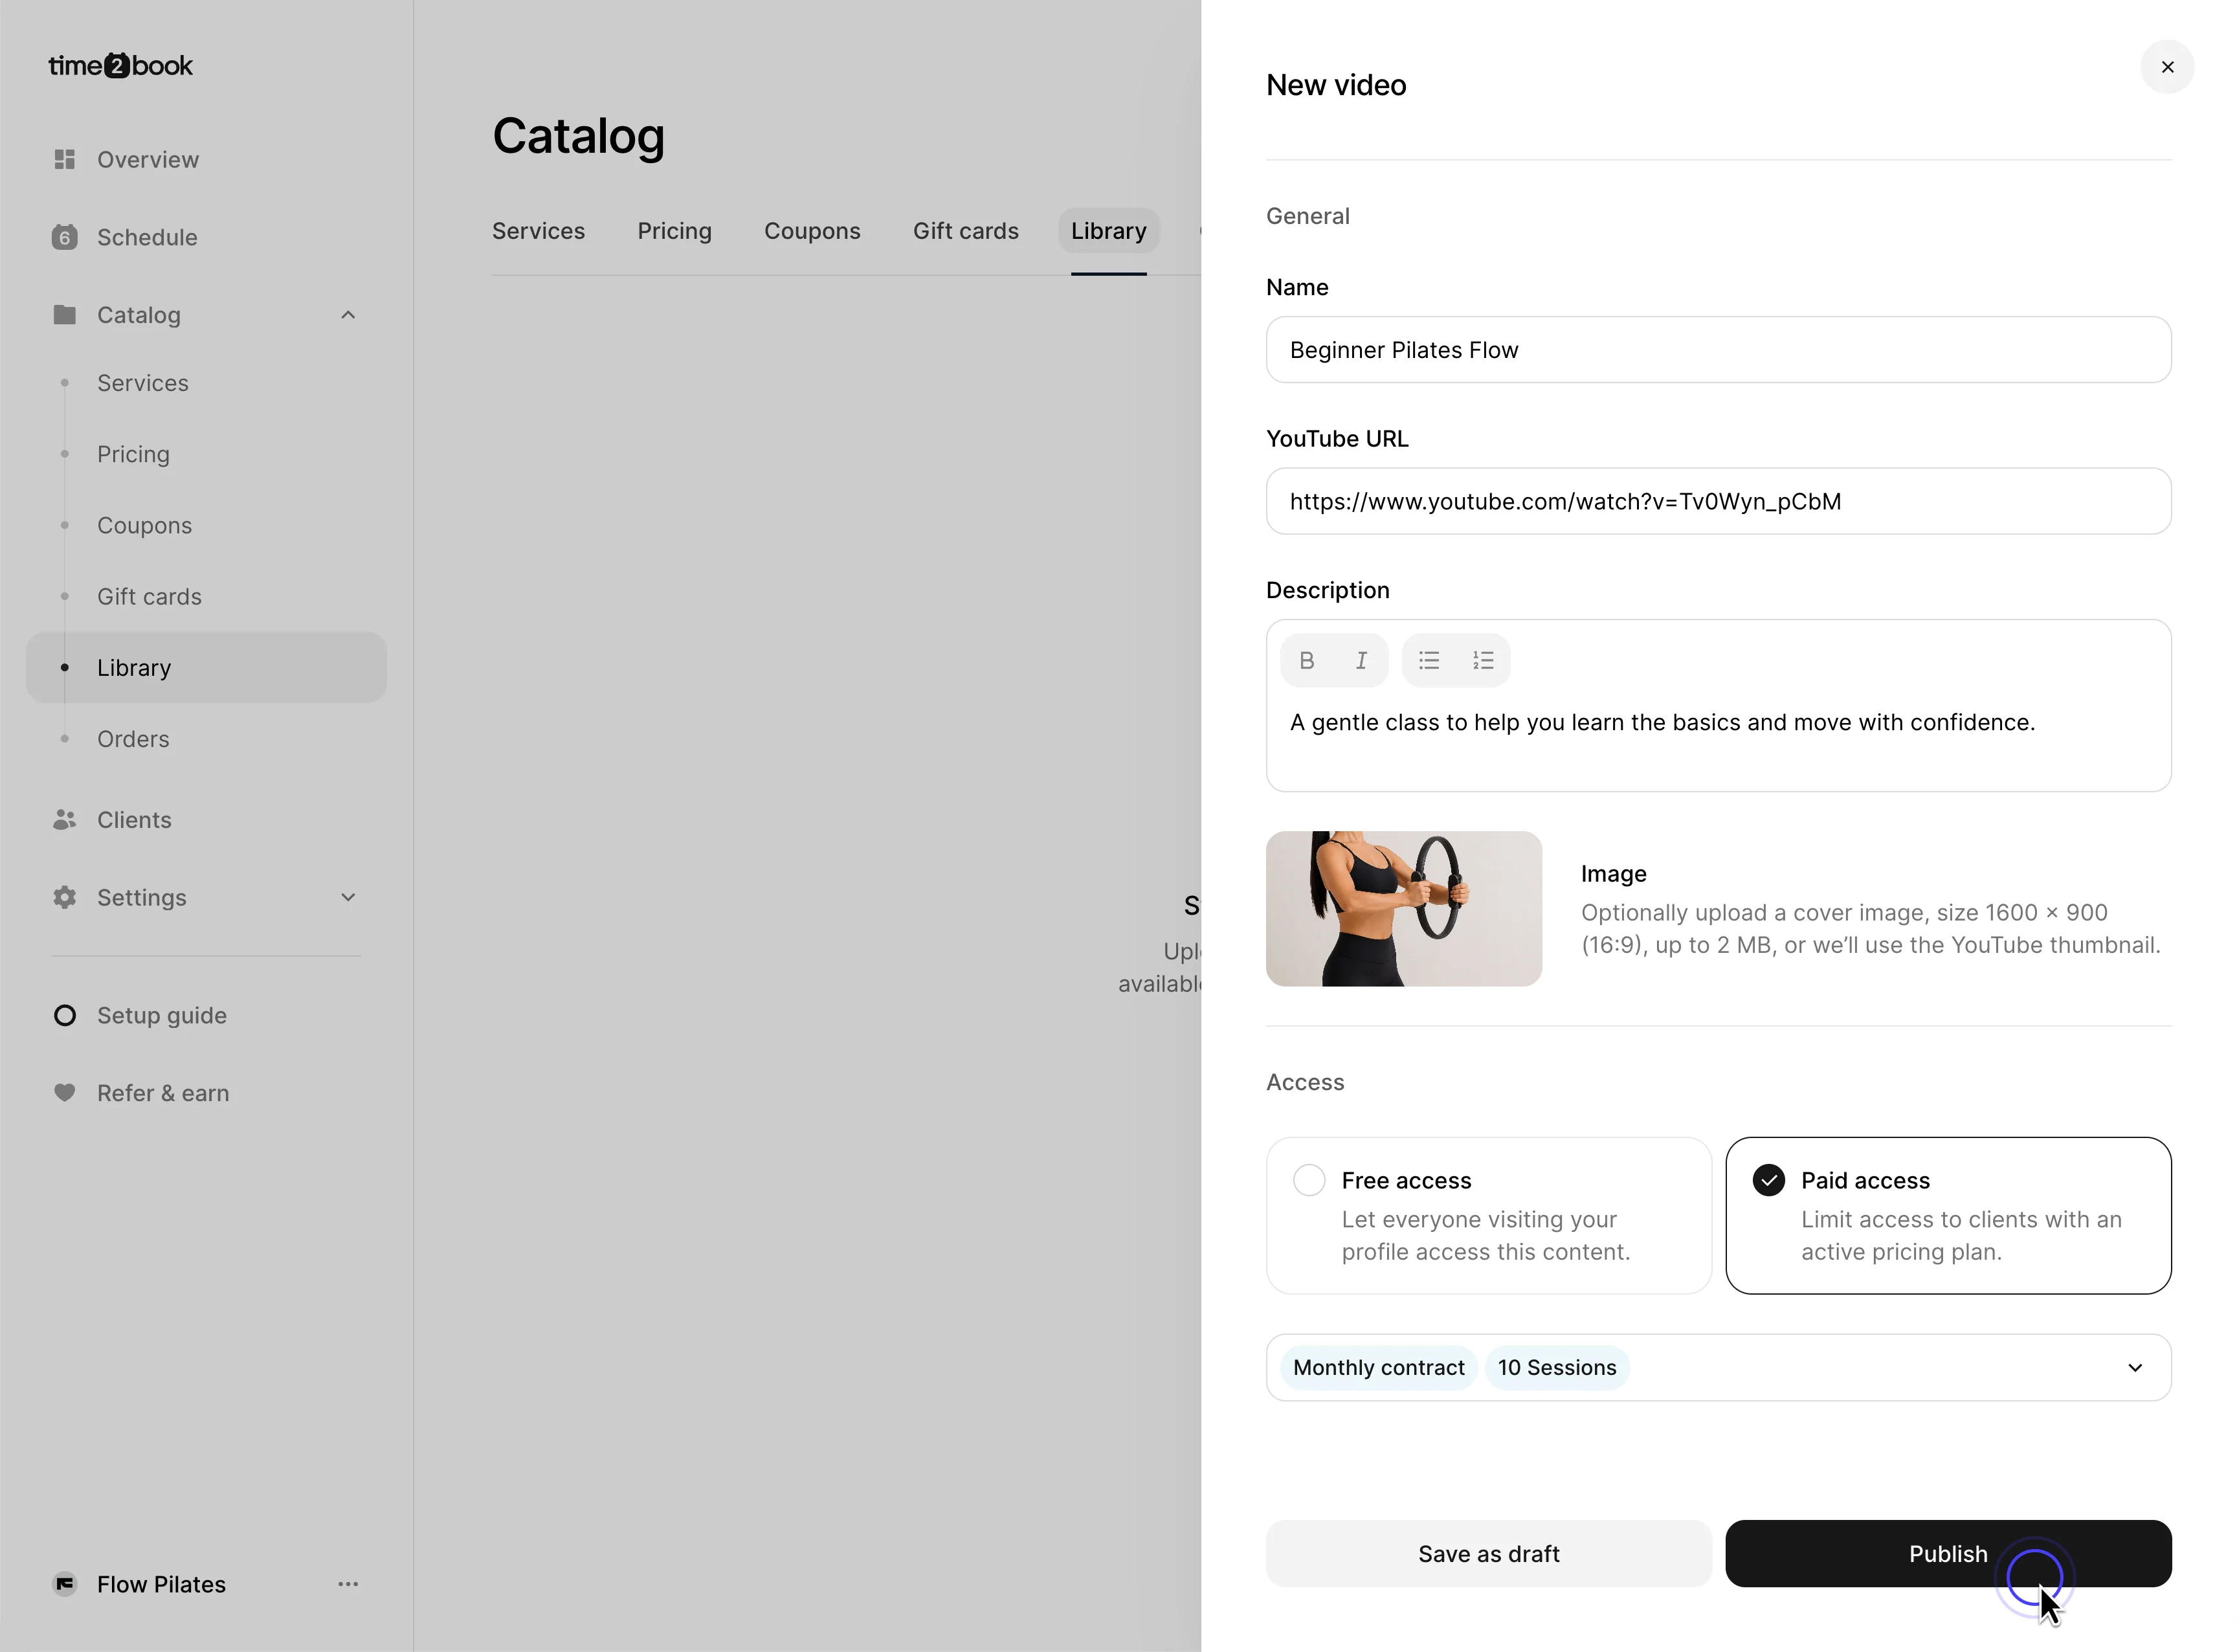
In the New video panel, fill in the video information:
- Name – Add a clear title for your video.
- YouTube URL – Paste the YouTube link for the video.
- Description – Add a short description so clients know what the video is about.
- Image – Optionally upload a cover image, size 1600 × 900, up to 2 MB. If you don’t add one, Time2book will use the YouTube thumbnail.
Step 3: Choose access
Choose how clients can access the video:
- Free access – Everyone visiting your profile can watch the video.
- Paid access – Only clients with an active pricing plan can unlock the video.
For paid videos, select one or more pricing plans that should include access to this video. This can be a recurring membership or a single-payment pack.
Click Publish to make the video available on your profile, or Save as draft if you want to finish it later.
How clients see your videos
Published videos appear under the Library tab on your booking profile.
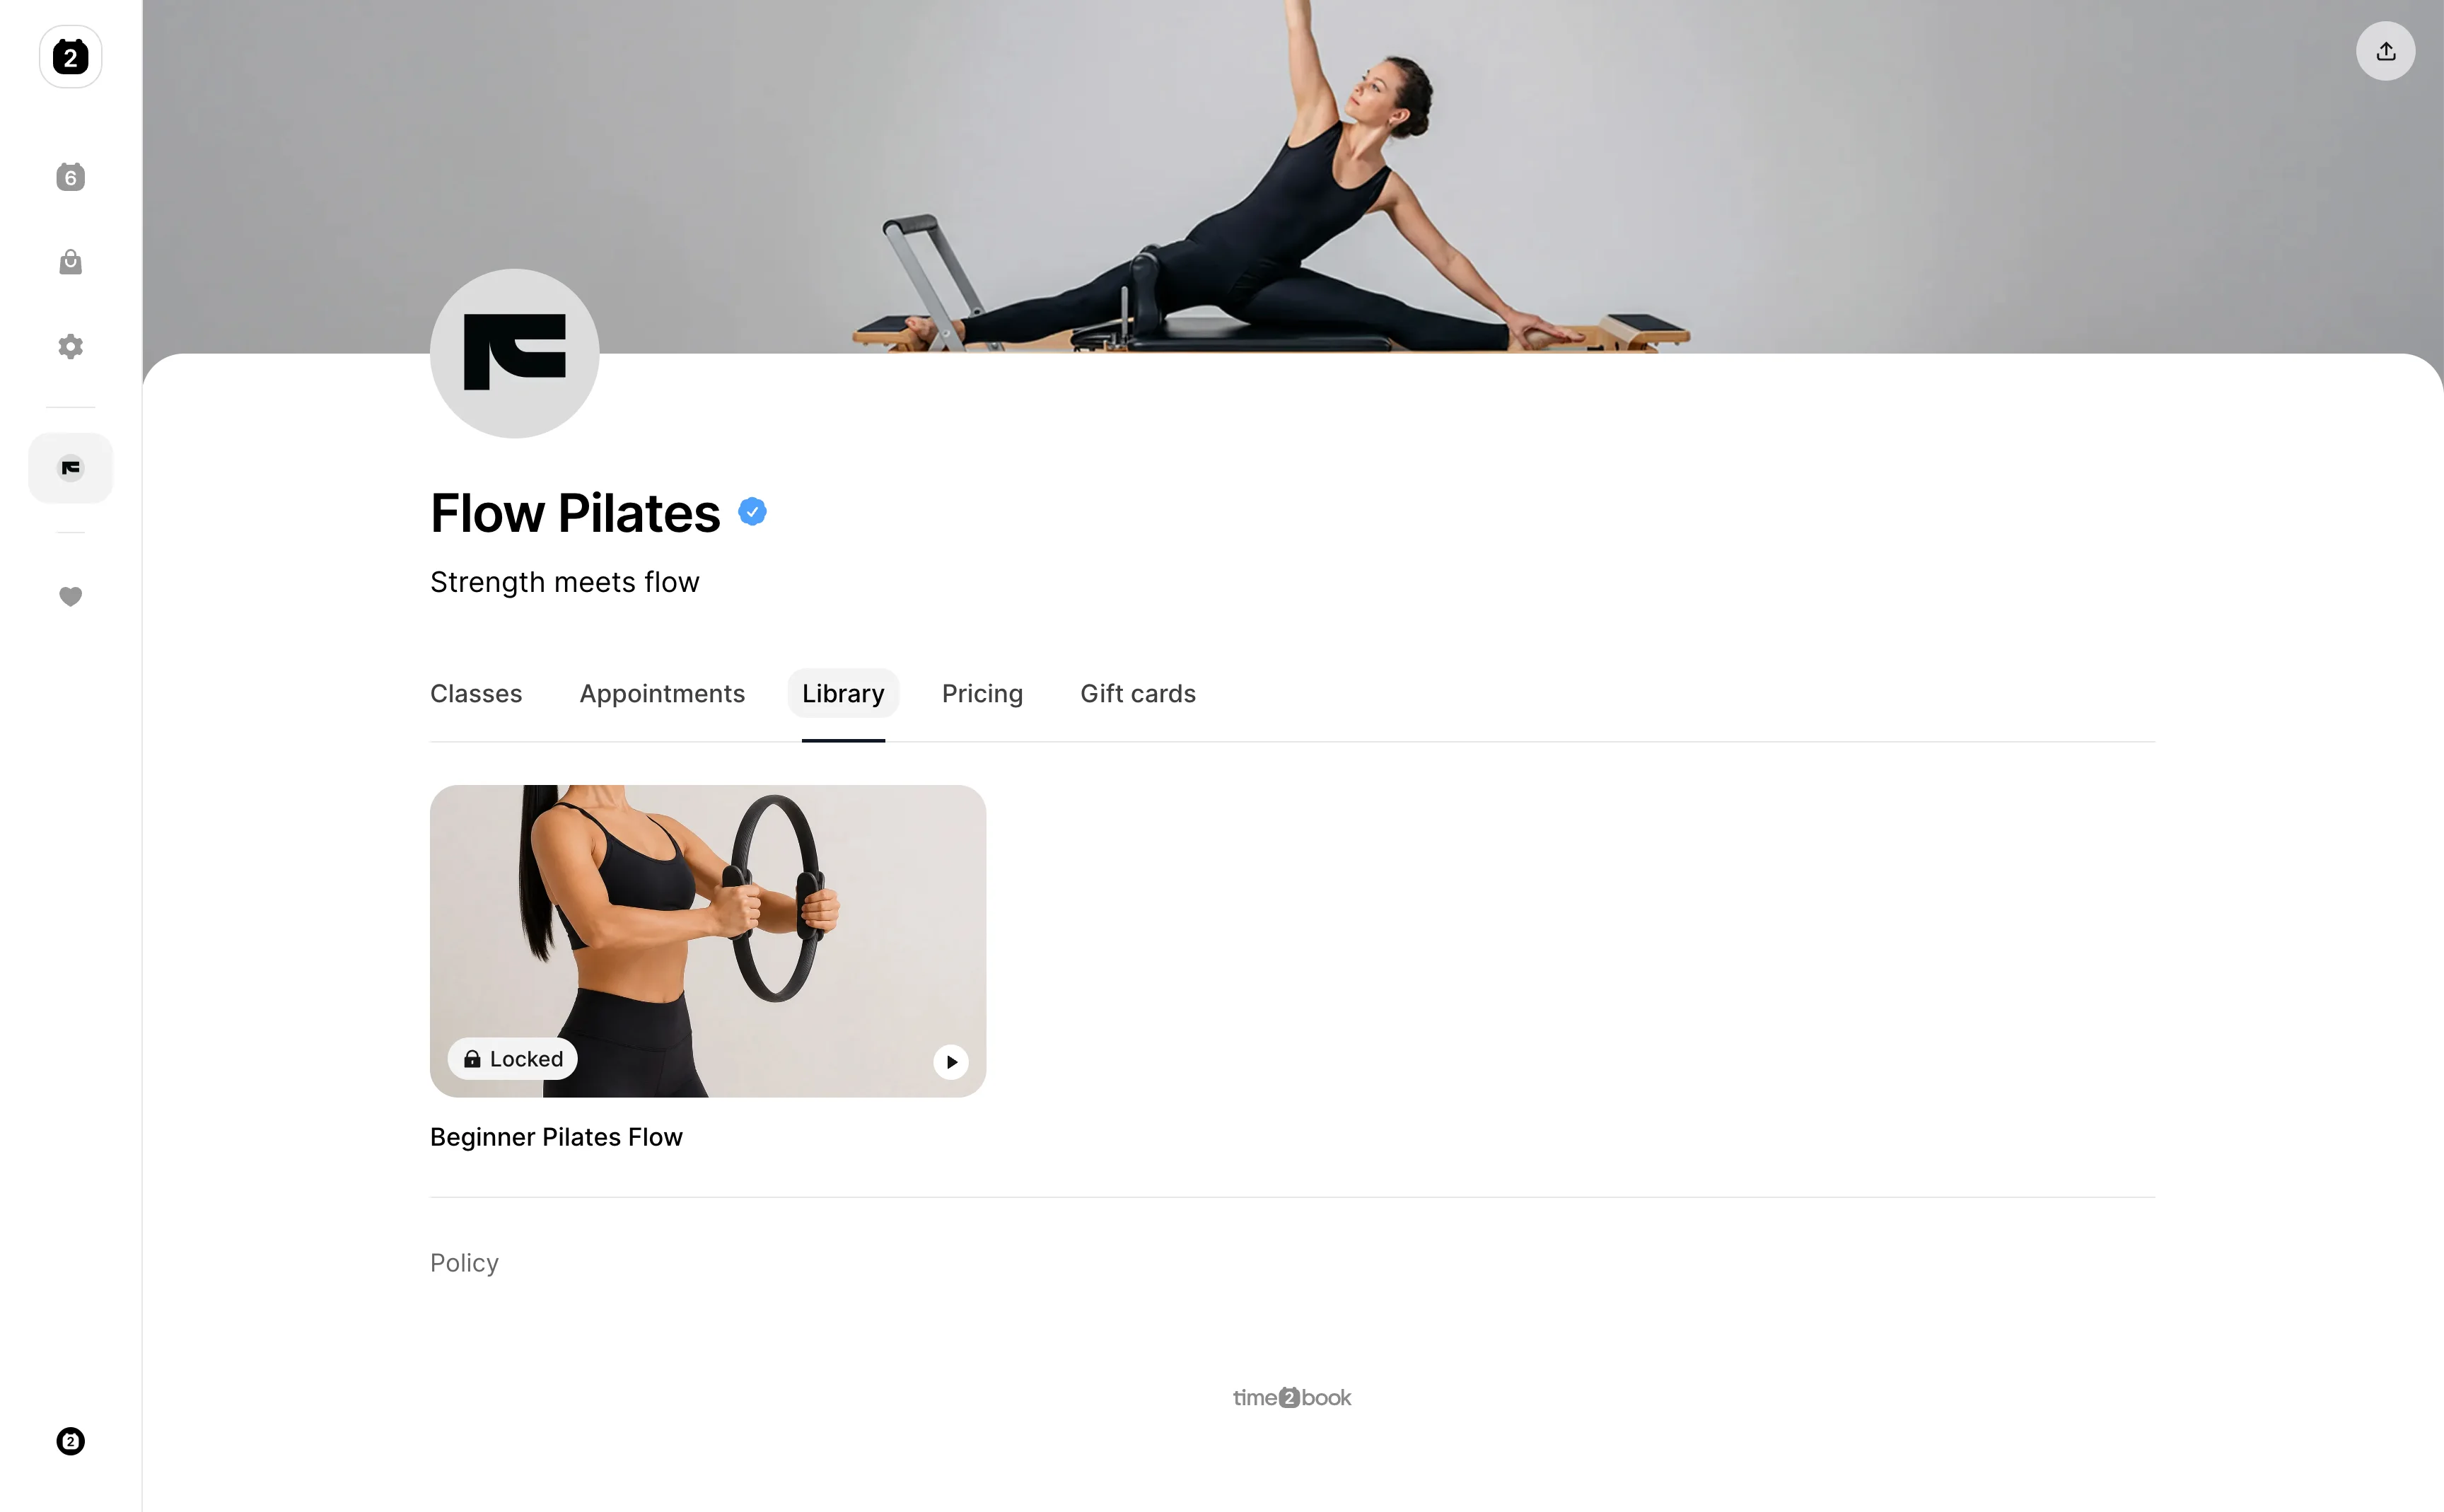
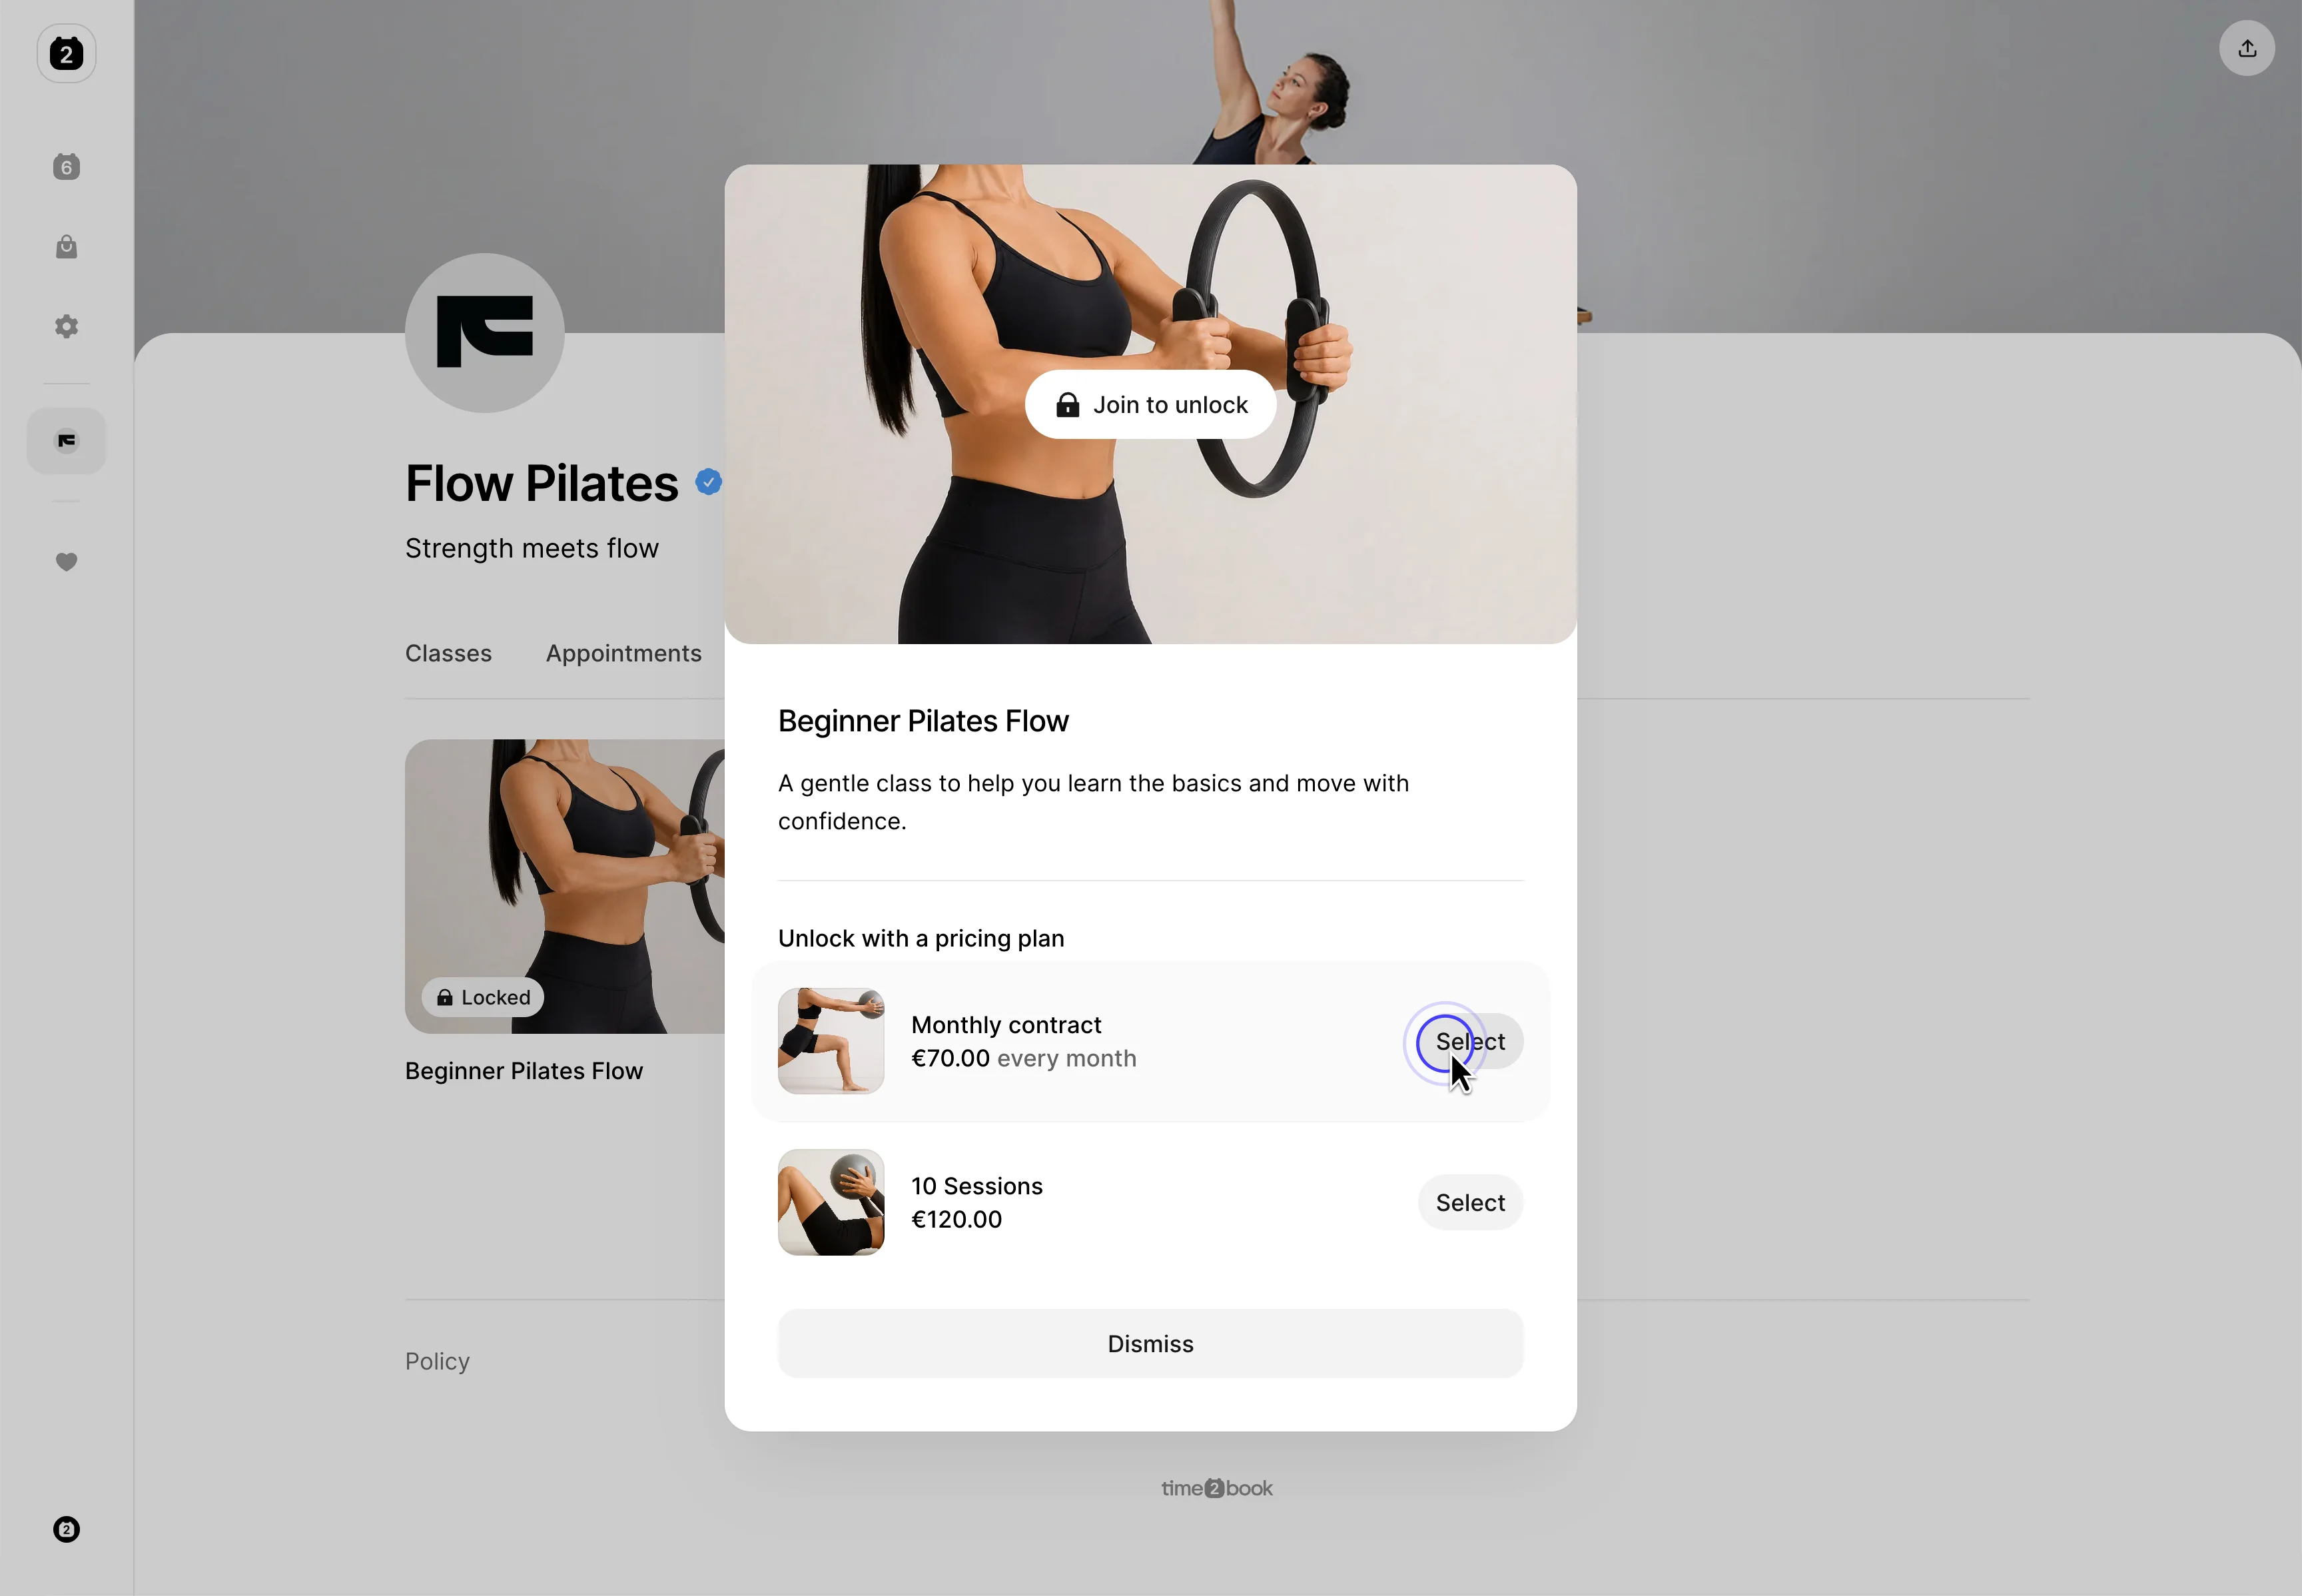
If a video is paid, clients will see it as locked. When they click it, they can choose one of the pricing plans linked to that video and complete checkout to unlock access.