


Scheduling a class
Once you’ve created your class services in Time2book, the next step is to add them to your schedule. This makes them available for clients to book online.
Step 1: Go to schedule
- From the left-hand menu, click schedule.
- In the upcoming tab, click the + button to add a class to your schedule.
Step 2: Select the service
- In the service dropdown, choose which class you’d like to schedule (e.g., Mat or Reformer).
- You’ll see the service details (duration, location, and capacity) displayed below.
If you don't see any services to select, you will first need to create one: How to create a class.
Step 3: Set availability
- Start time – Choose the date and time for when the class begins.
- Repeat – Select how often the class should repeat:does not repeat
- weekly
- every 2 weeks
- every 3 weeks
- every 4 weeks
Step 4: Choose days (if repeating)
- If you select a repeating option (e.g., weekly), pick the days of the week when the class should take place (e.g., monday, wednesday, friday).
- A summary will show below, confirming your chosen days and times.
Step 5: Add instructor (optional)
If you have team members, you can assign an instructor to the class.
- In the Instructor section, click Add instructor.
- Select one or more instructors from your team.
If you don’t see any instructors available, you’ll first need to invite team members. Once invited, they can be assigned as instructors to classes. Learn how to assing instructor to a class.
Step 6: Add the class
- Once all details are set, click add class.
- Your scheduled class will now appear in the schedule list.\
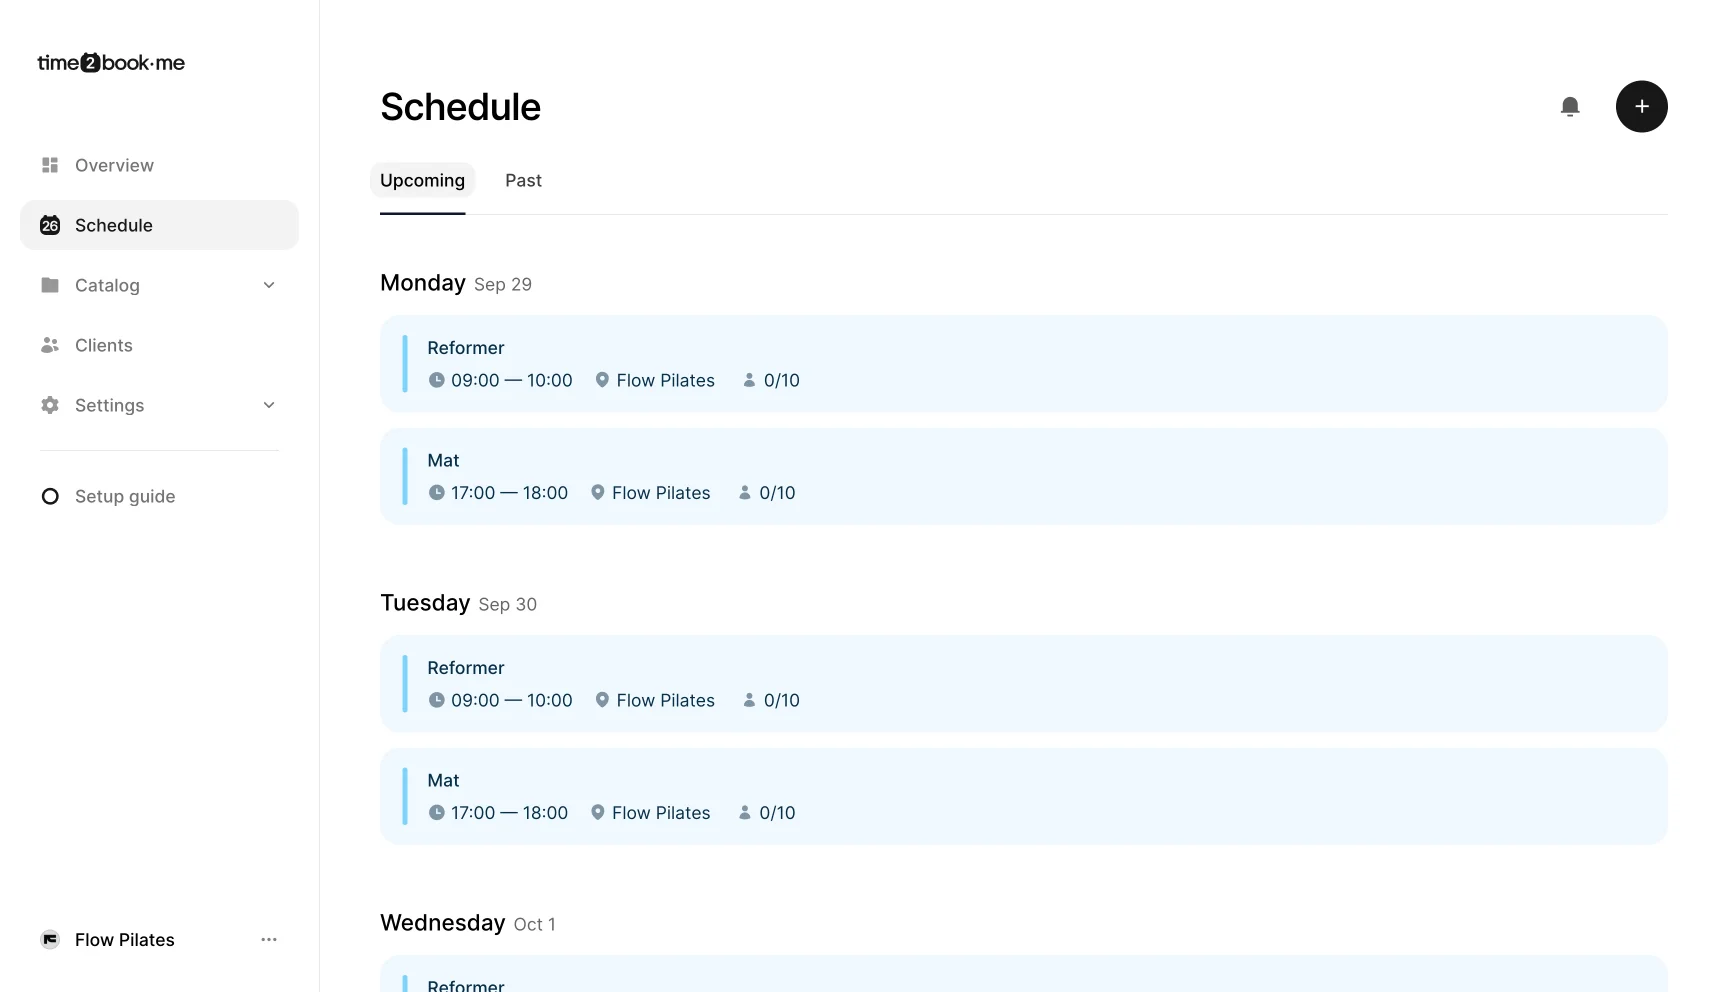
Classes on your public profile
When you schedule a class, it becomes visible on your public shareable profile. Clients can browse available dates, check open slots, and book directly online. This is how clients interact with your schedule and reserve their place.

Managing classes in your schedule
As the studio owner, you’ll see all scheduled classes inside your schedule view. When you click on a time slot, you can:
- View class details (service, date, and time).
- See the list of attending clients.
- Check cancellations.
- Add or remove clients manually if needed.
- Cancel the entire class if required.
This gives you full visibility and control over all studio bookings.