


Waitlist
The waitlist feature allows clients to join a queue when a class is fully booked. When a spot becomes available, Time2book automatically books the next client in line — so you don’t have to manage it manually.
Enable waitlist
To allow clients to join a waitlist:
- Go to Settings → Policies.
- Scroll to the Waitlist section.
- Turn on the Waitlist toggle.
- Click Save changes.
Once enabled, clients will see a Join waitlist button when a class has no spots left.
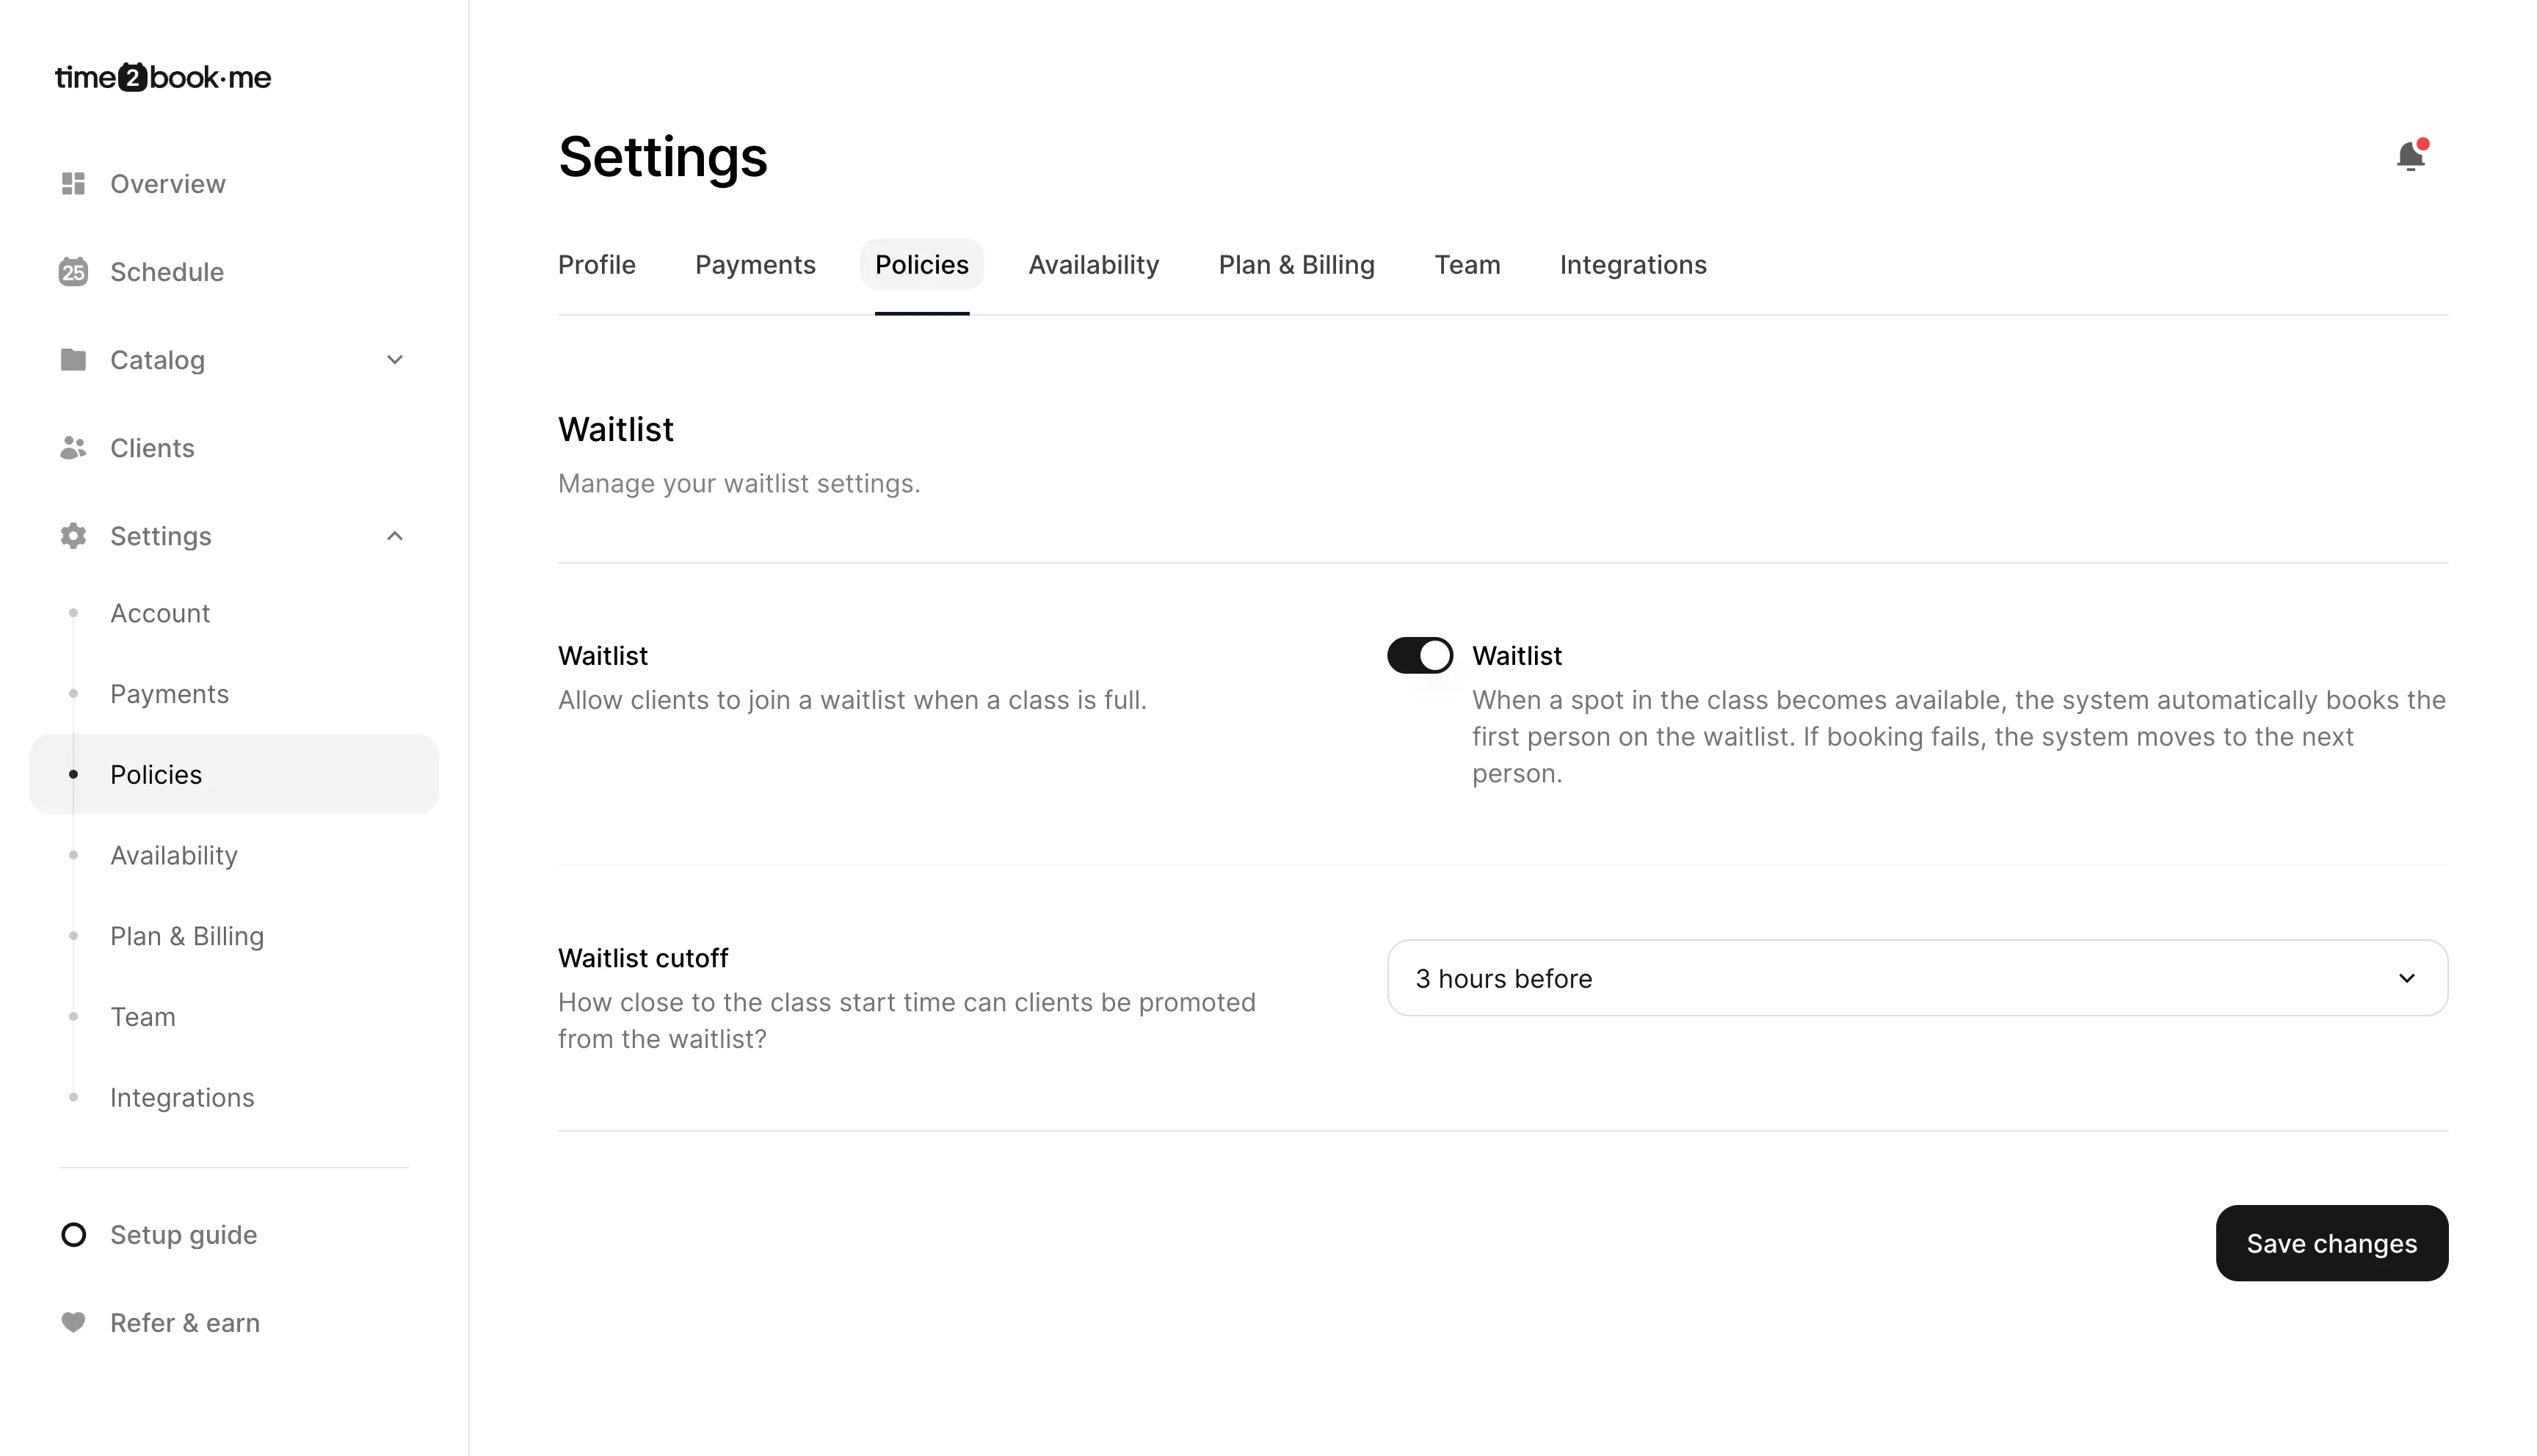
Set waitlist cutoff time
You can control how close to the class start time clients can still be promoted from the waitlist.
- Go to Settings → Policies.
- Under Waitlist cutoff, choose how many hours before class auto-booking should stop.
- Click Save changes.
After the cutoff time, clients will remain on the waitlist but won’t be automatically booked in.
How clients join the waitlist
When a class is fully booked:
- The client clicks Join waitlist on the class.
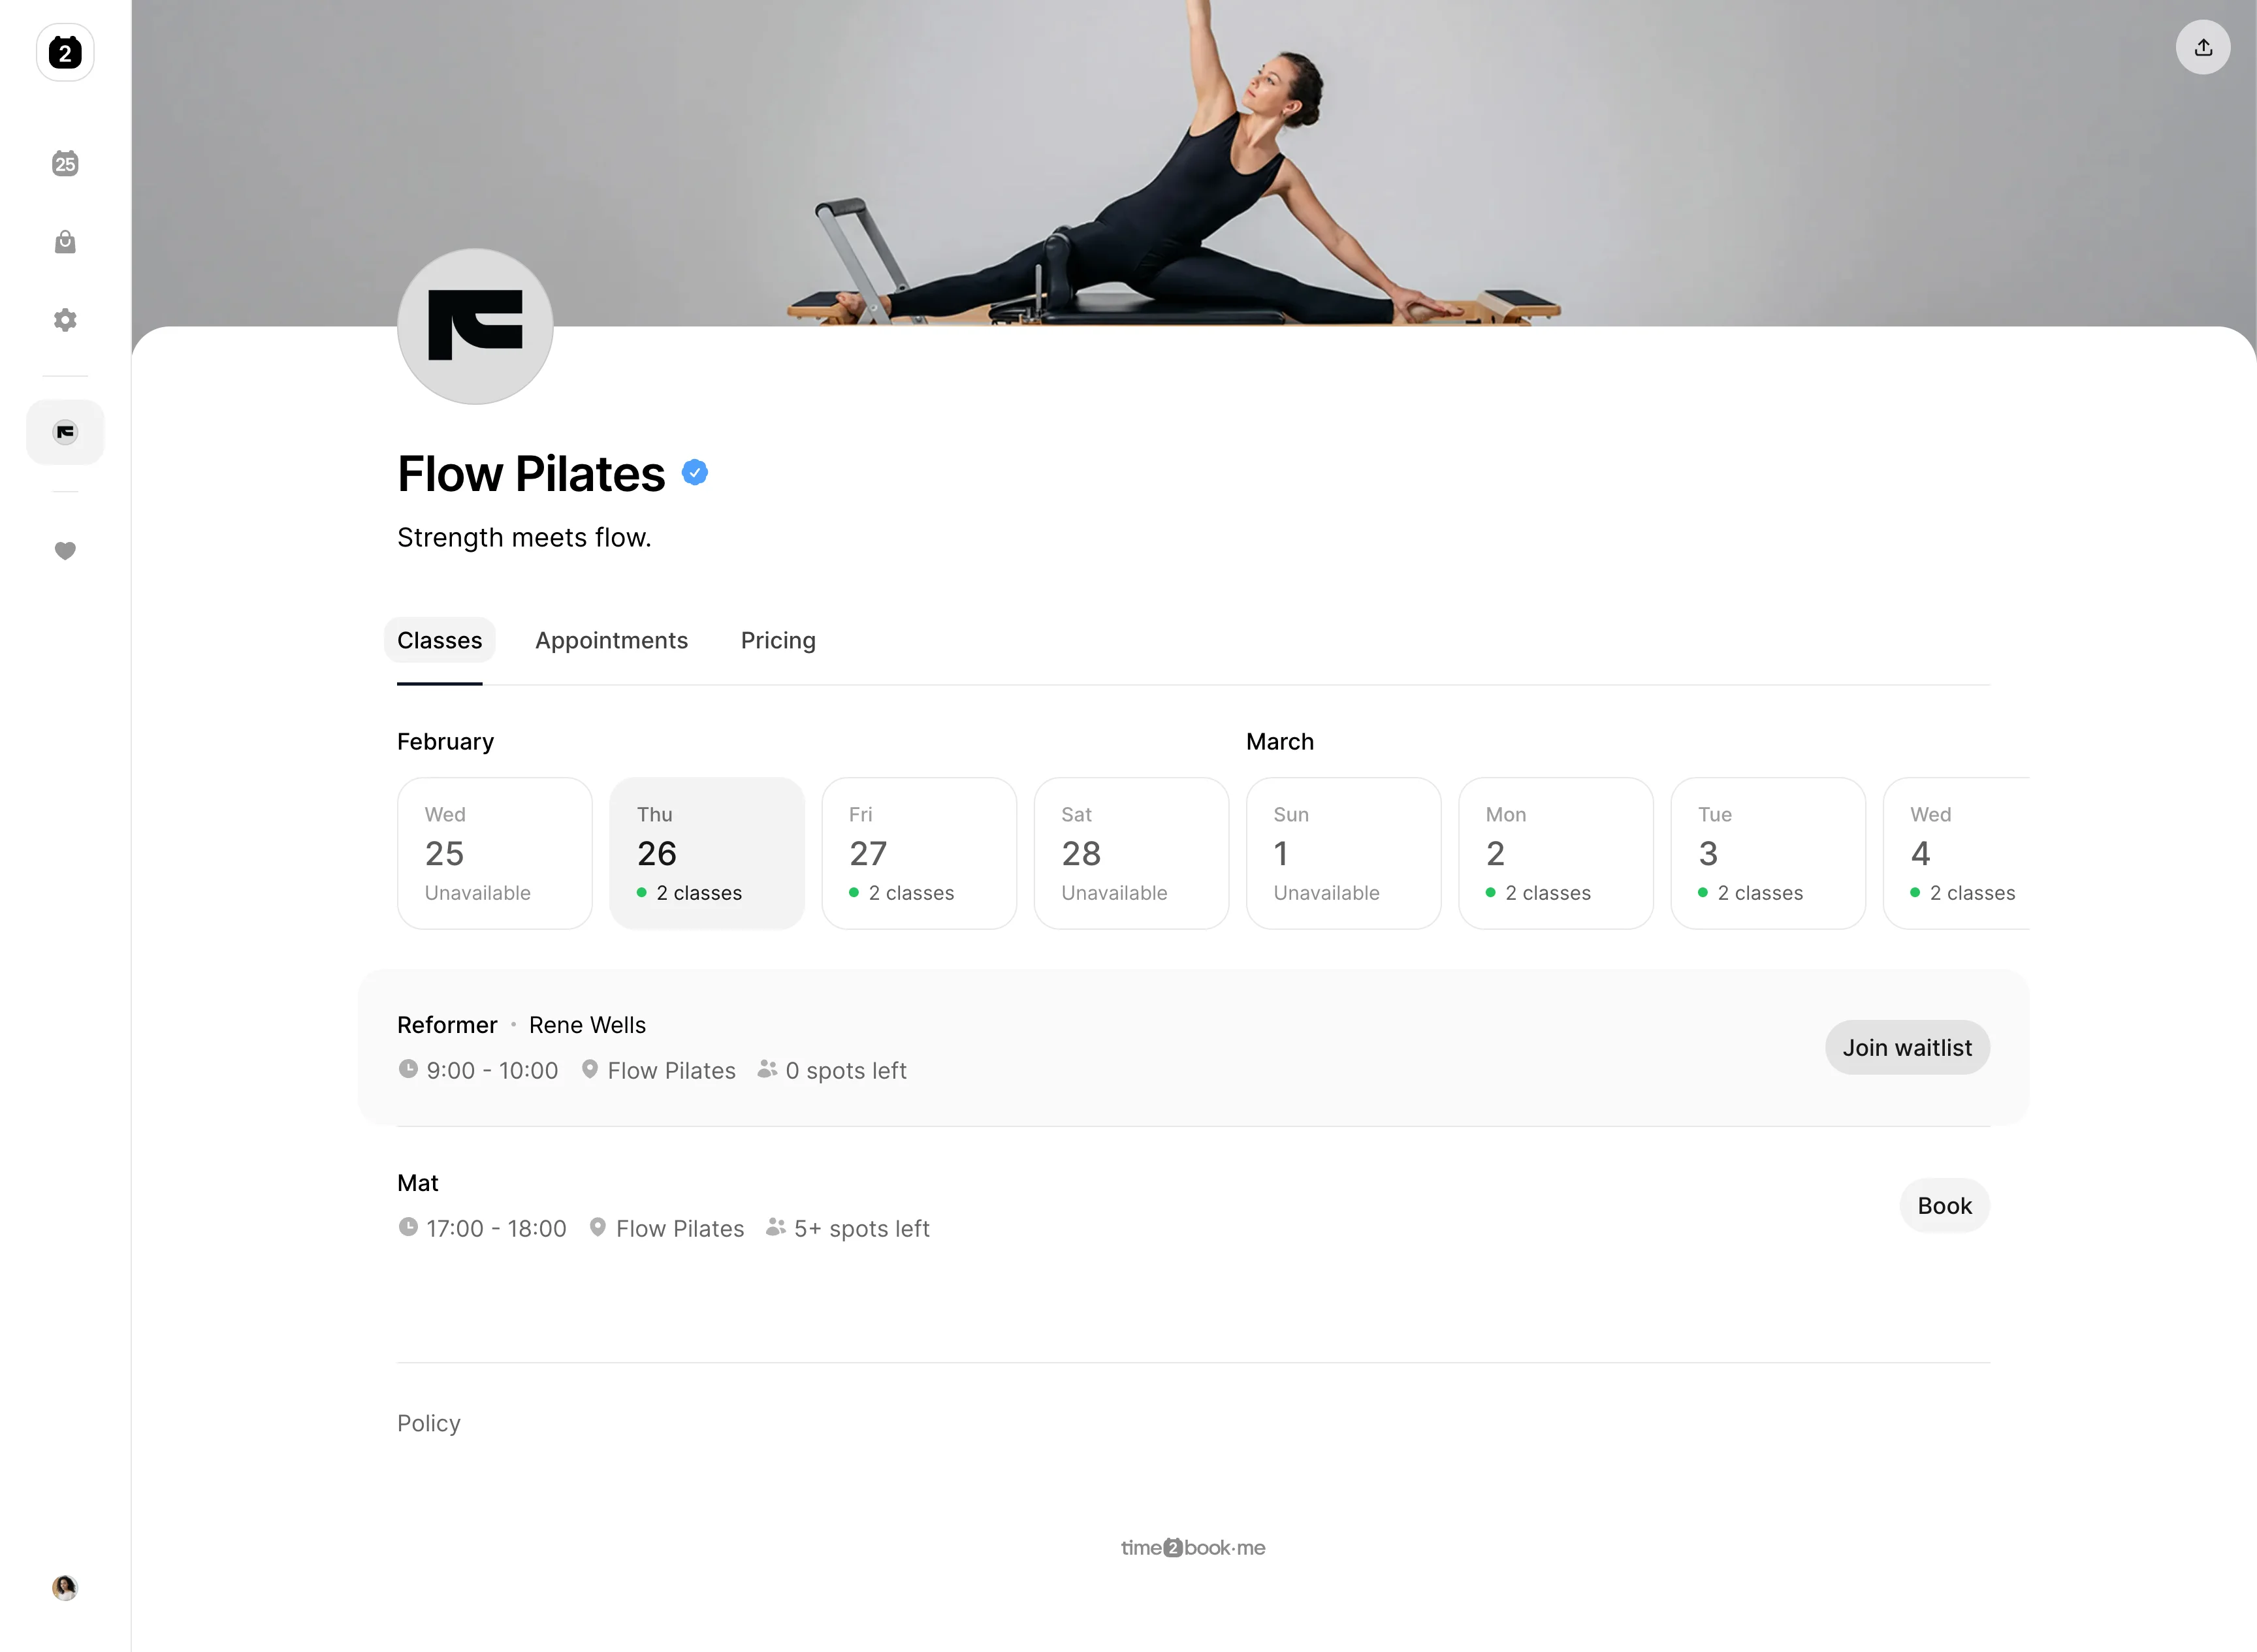
- They confirm their booking.
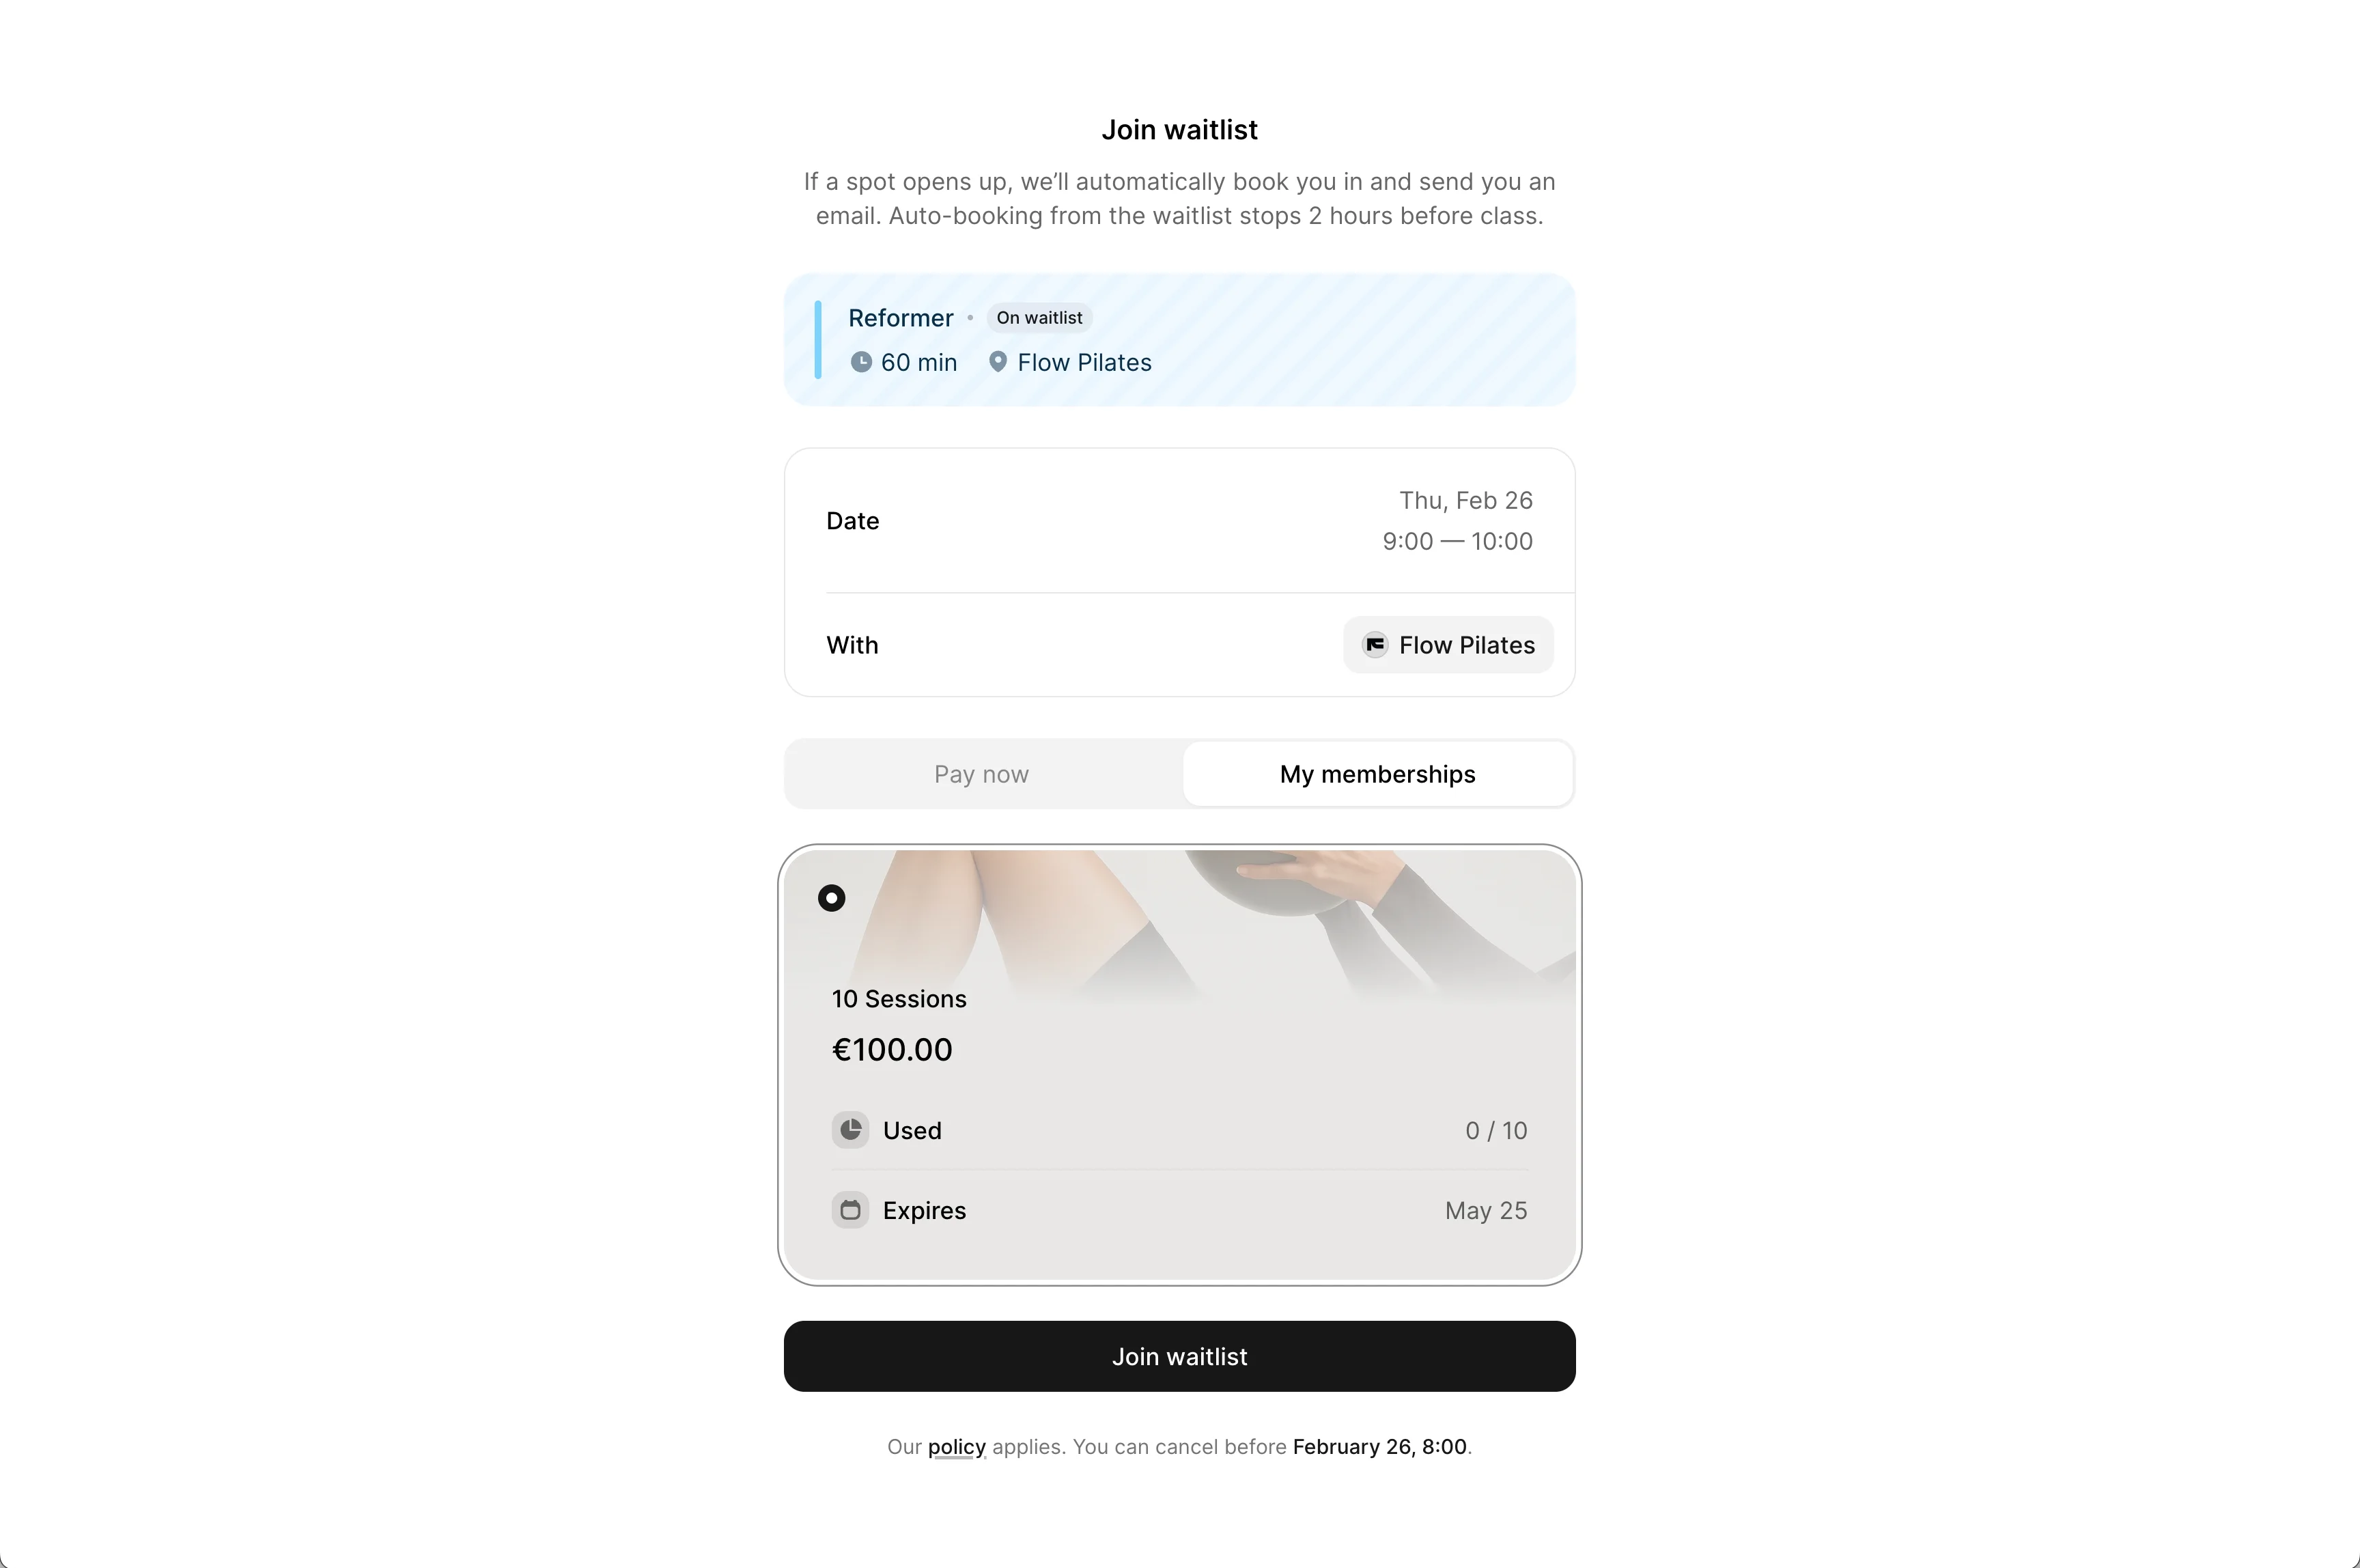
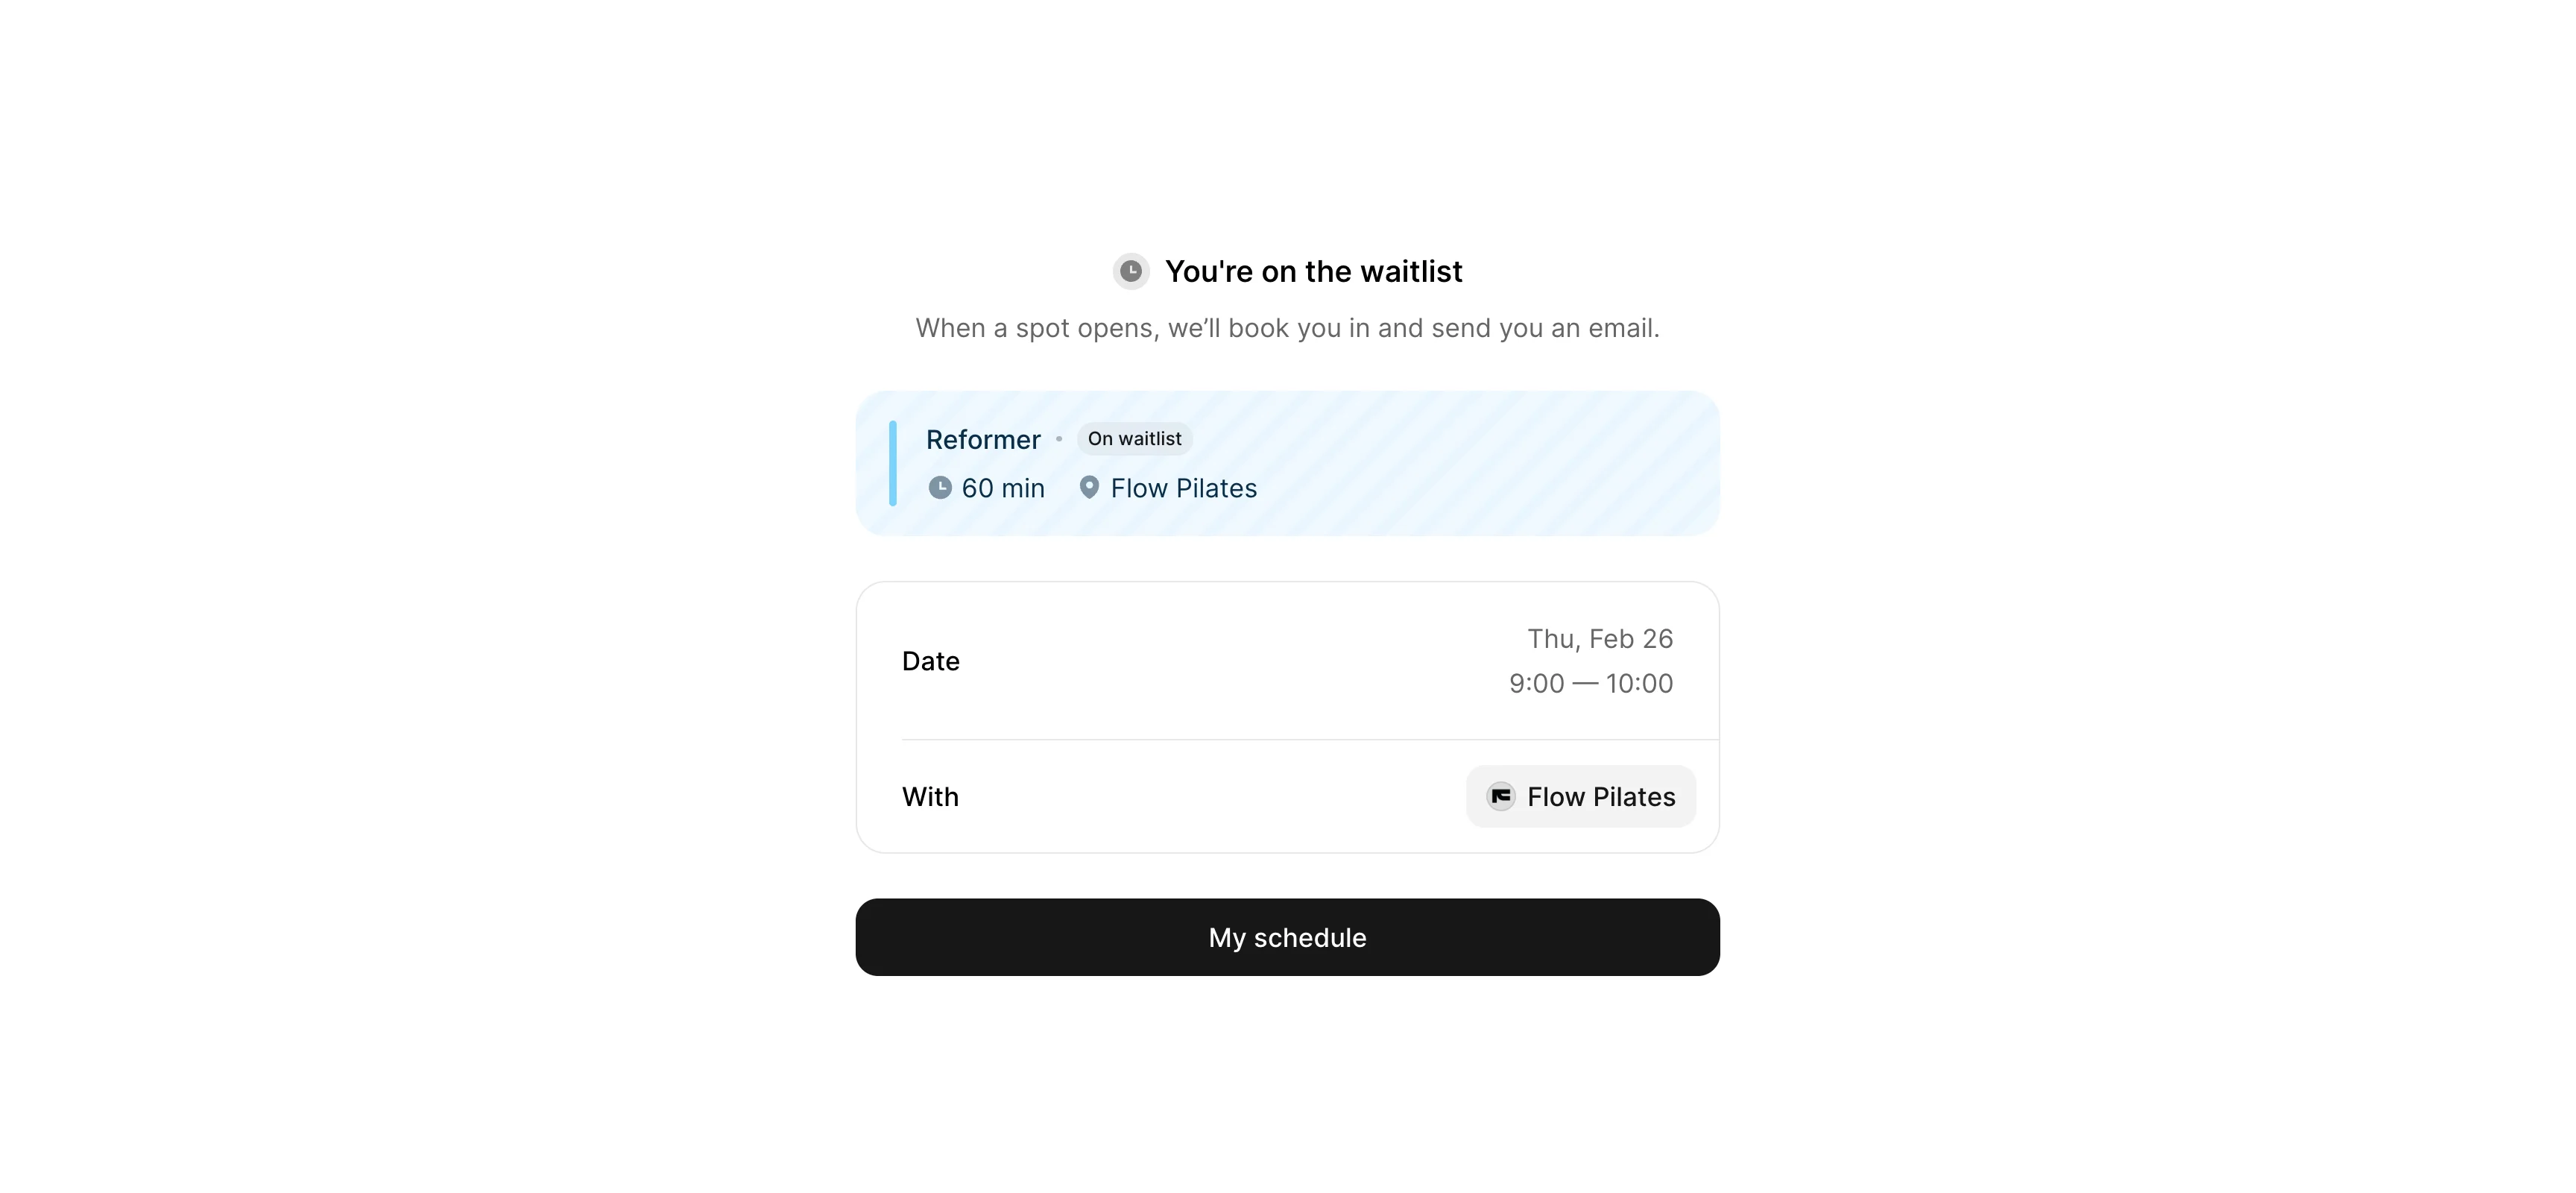
- They’ll see a confirmation that they’ve joined the waitlist and receive an email confirming they’re on it. If a spot becomes available and they’re automatically booked in, they’ll receive another email.
Automatic booking from the waitlist
When a spot becomes available:
- The system automatically books the first client on the waitlist.
- If the booking fails (for example, no credits left in the membership), the system moves to the next person.
- The client who gets booked receives an email notification confirming their booking.
This ensures empty spots are filled automatically without manual follow-up.
View waitlist for a class
You can see who is on the waitlist for any class:
- Go to Schedule.
- Click on a specific class.
- In Clients section, open the Waitlist tab.
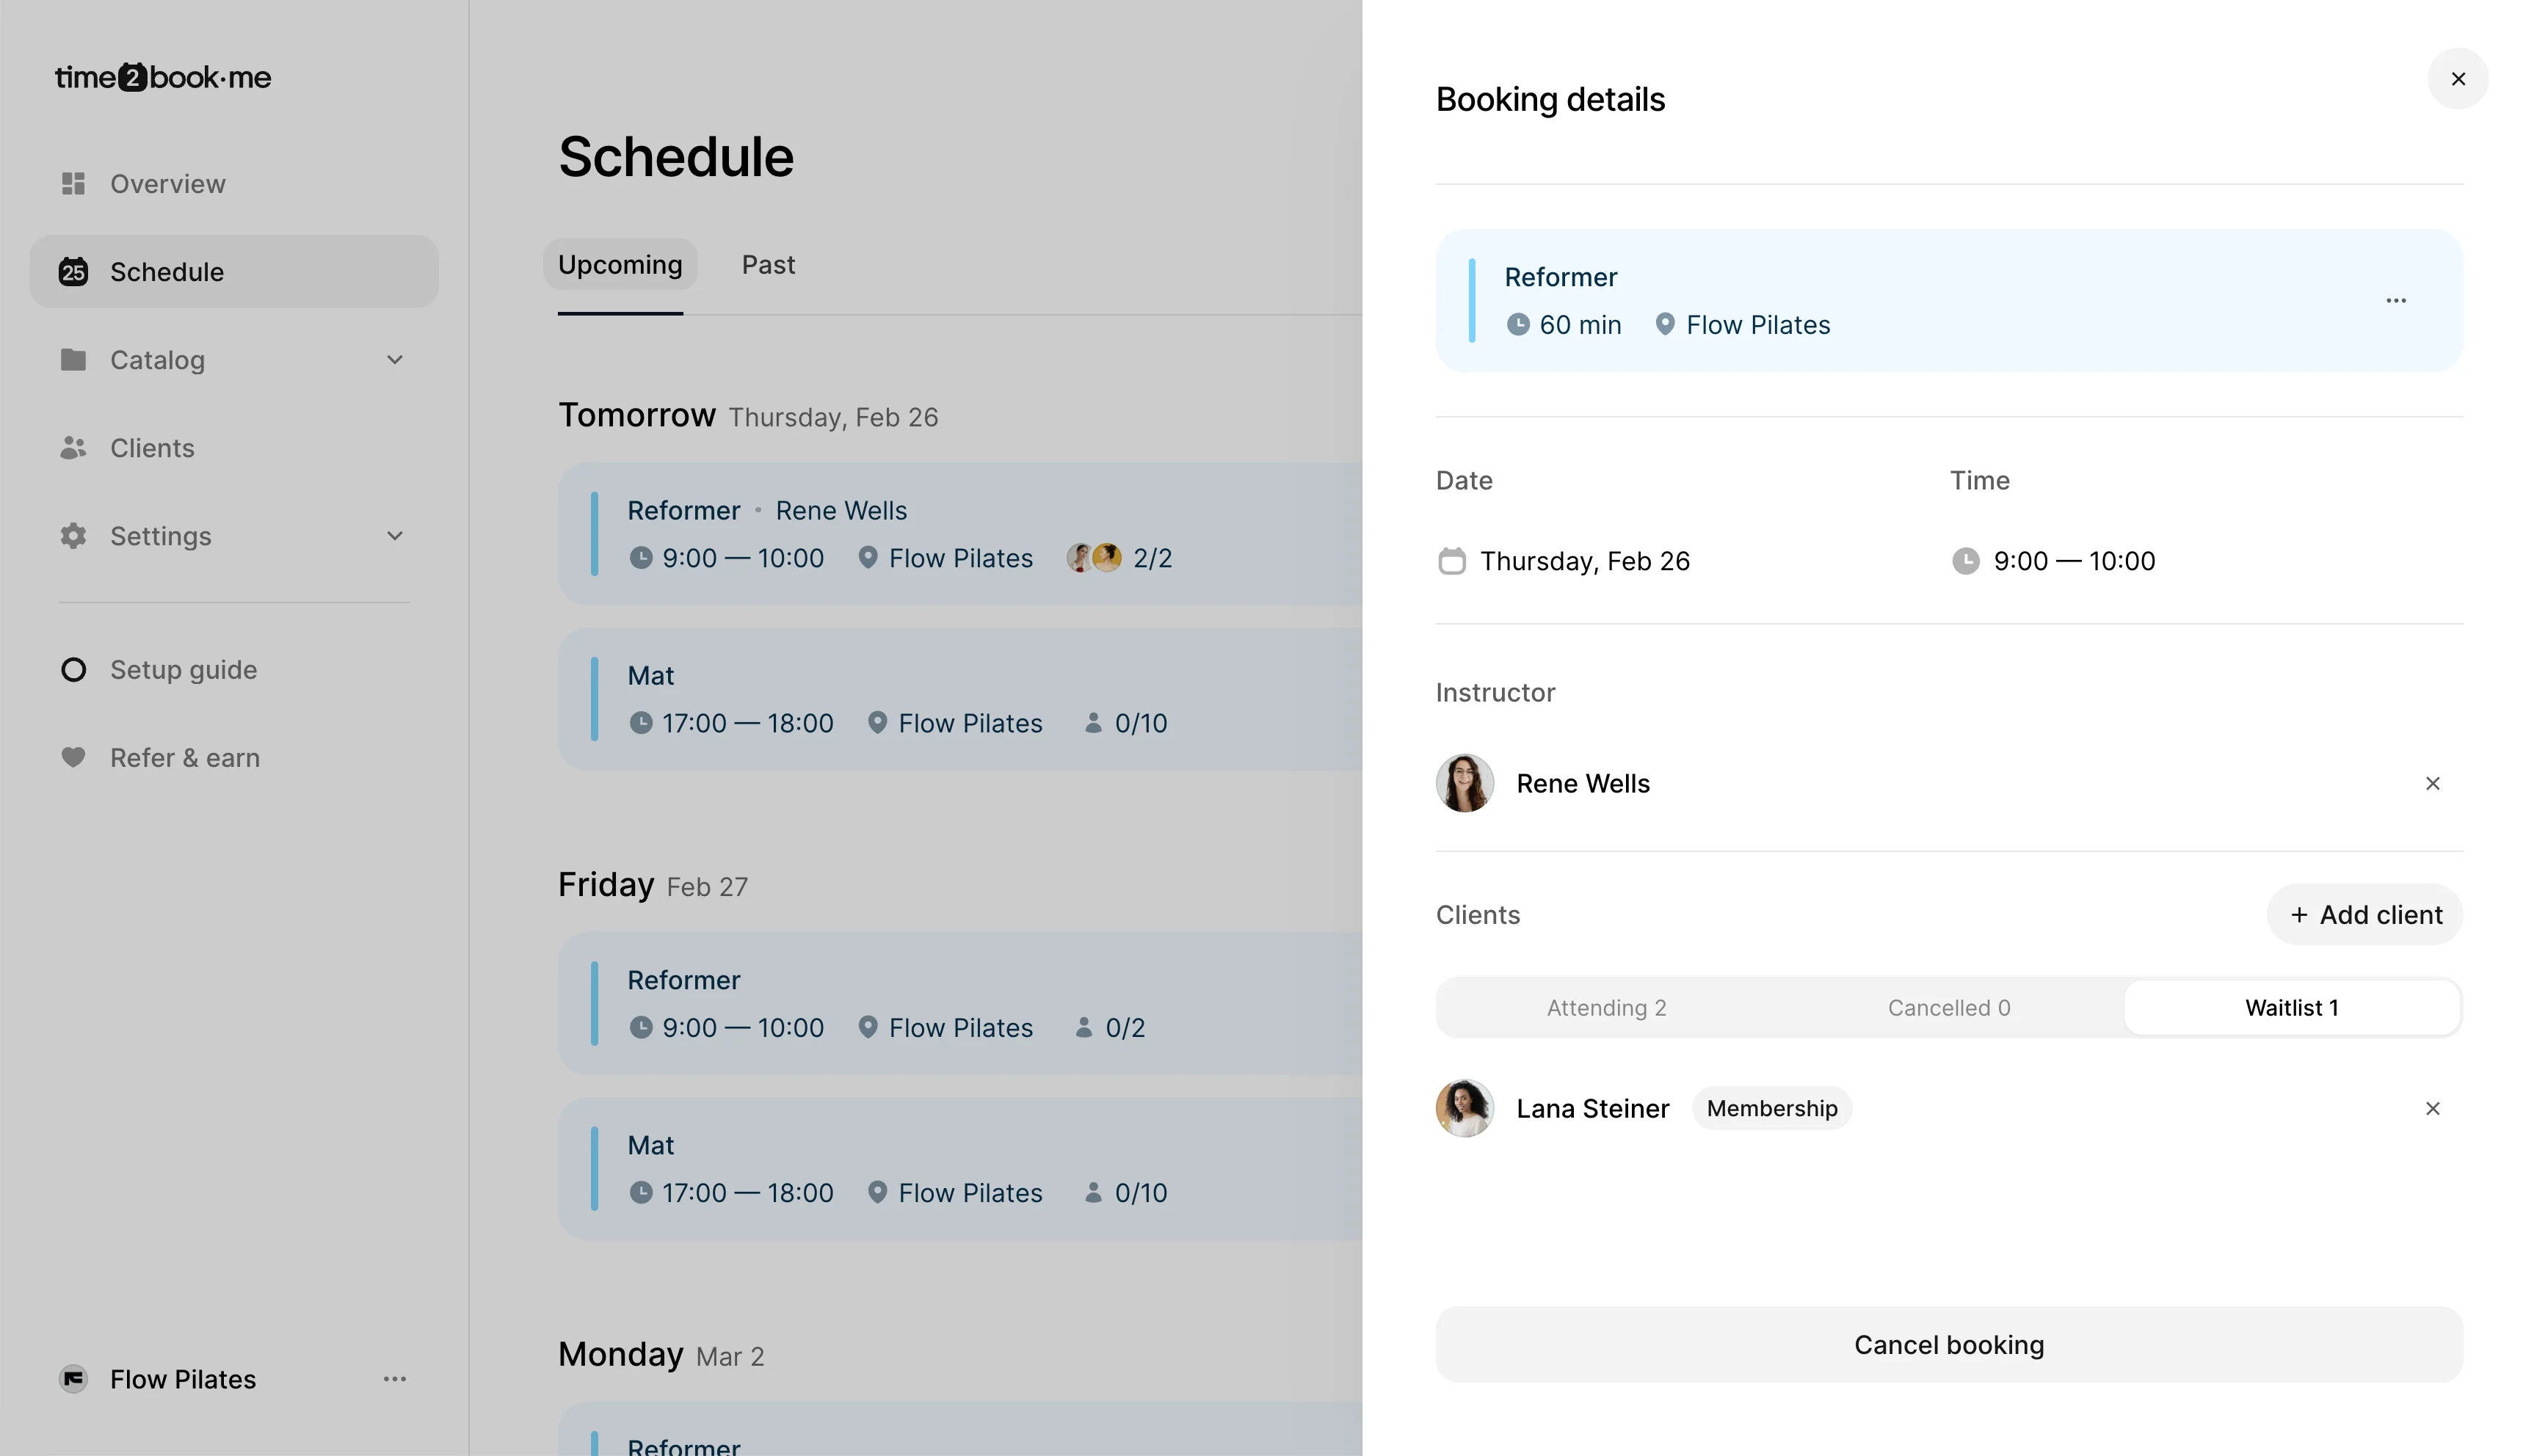
Clients are listed in order — the client at the top joined first and will be promoted first when a spot becomes available.