


How to Set Up Online Booking for Yoga Studio
Apr 20, 2025

If you’re running a yoga studio—or teaching solo classes—you already know how much time goes into scheduling, payments, and keeping everything organized. It’s easy to get caught up in admin and lose valuable time you could be spending on your students or your own practice.
The good news? You can set up online booking for your yoga studio in under 30 minutes, without any tech skills or complicated tools.
In this guide, we’ll walk you through a simple step-by-step setup:From creating your class schedule to accepting payments online—all using a booking platform designed to make your yoga business flow.
1. Why online booking matters for your yoga studio
Running a yoga studio—or even teaching solo sessions—means wearing many hats. You’re guiding classes, welcoming students, managing payments, answering messages, and updating your schedule… sometimes all in the same hour.
That’s where online booking changes everything.
It replaces:
- Manual signups over DMs or text
- Chasing down payments or missed fees
- Confusion around class times and space availability
- Last-minute cancellations or no-shows without notice
And instead, gives you:
- A real-time class schedule clients can book from anytime
- Automatic confirmations and reminders
- Upfront payments with zero follow-up needed
- A calm, organized system that frees up your energy for teaching
It’s not just easier for you—it’s better for your students.
Today’s yoga clients expect a seamless experience: mobile booking, clear class info, and flexible payment. Online booking helps you meet those expectations—while giving you more control, more time, and fewer distractions. It’s not about adding more tools. It’s about removing the friction.
2. What you need before you start
Good news—getting your yoga studio set up for online bookings doesn’t take much. In fact, you probably have everything ready already.
Here’s what you’ll want to have on hand before starting your setup:
A list of your classes
Include:
- Class names (e.g. Vinyasa Flow, Beginner Hatha)
- Duration (45, 60, or 90 mins)
- How often each class runs
- Any level restrictions (e.g. beginner-friendly, intermediate, etc.)
Your pricing structure
Think about:
- Drop-in rates
- Class packs (e.g. 5 or 10 classes)
- Memberships (weekly or monthly recurring)
- Free trials, if you offer them
Your availability and instructors (if any)
- Days and times you’re available
- Any other instructors and what classes they teach
- Holiday closures or special sessions
A Stripe account (or a way to accept payments)
Most platforms, including Time2Book, connect with Stripe so you can accept credit cards, Apple Pay, and more—safely and automatically.
Great photo or logo
This will appear on your public booking page. It’s not required—but it makes your studio feel more personal and professional.
3. Create your account and studio profile
Now that you’ve gathered your class info and pricing, let’s get your yoga studio online.
Here’s how to get started:
- Go to Time2Book.me and click “Get started”It’s free to create an account—no credit card required.
- Enter your name, studio name, and contact infoYou can use your own name if you're a solo instructor.
- This info appears on your public booking page.
- Upload a logo or profile photo (optional, but nice!)This helps your studio feel more personal and polished.
- Set your username for sharable profile linkThink of a unique username that your clients will reach your booking profile e.g. time2book.me/flow_yoga.
This step usually takes less than 5 minutes. Once you’re in, you’ll land on your dashboard—ready to start adding your classes and pricing.
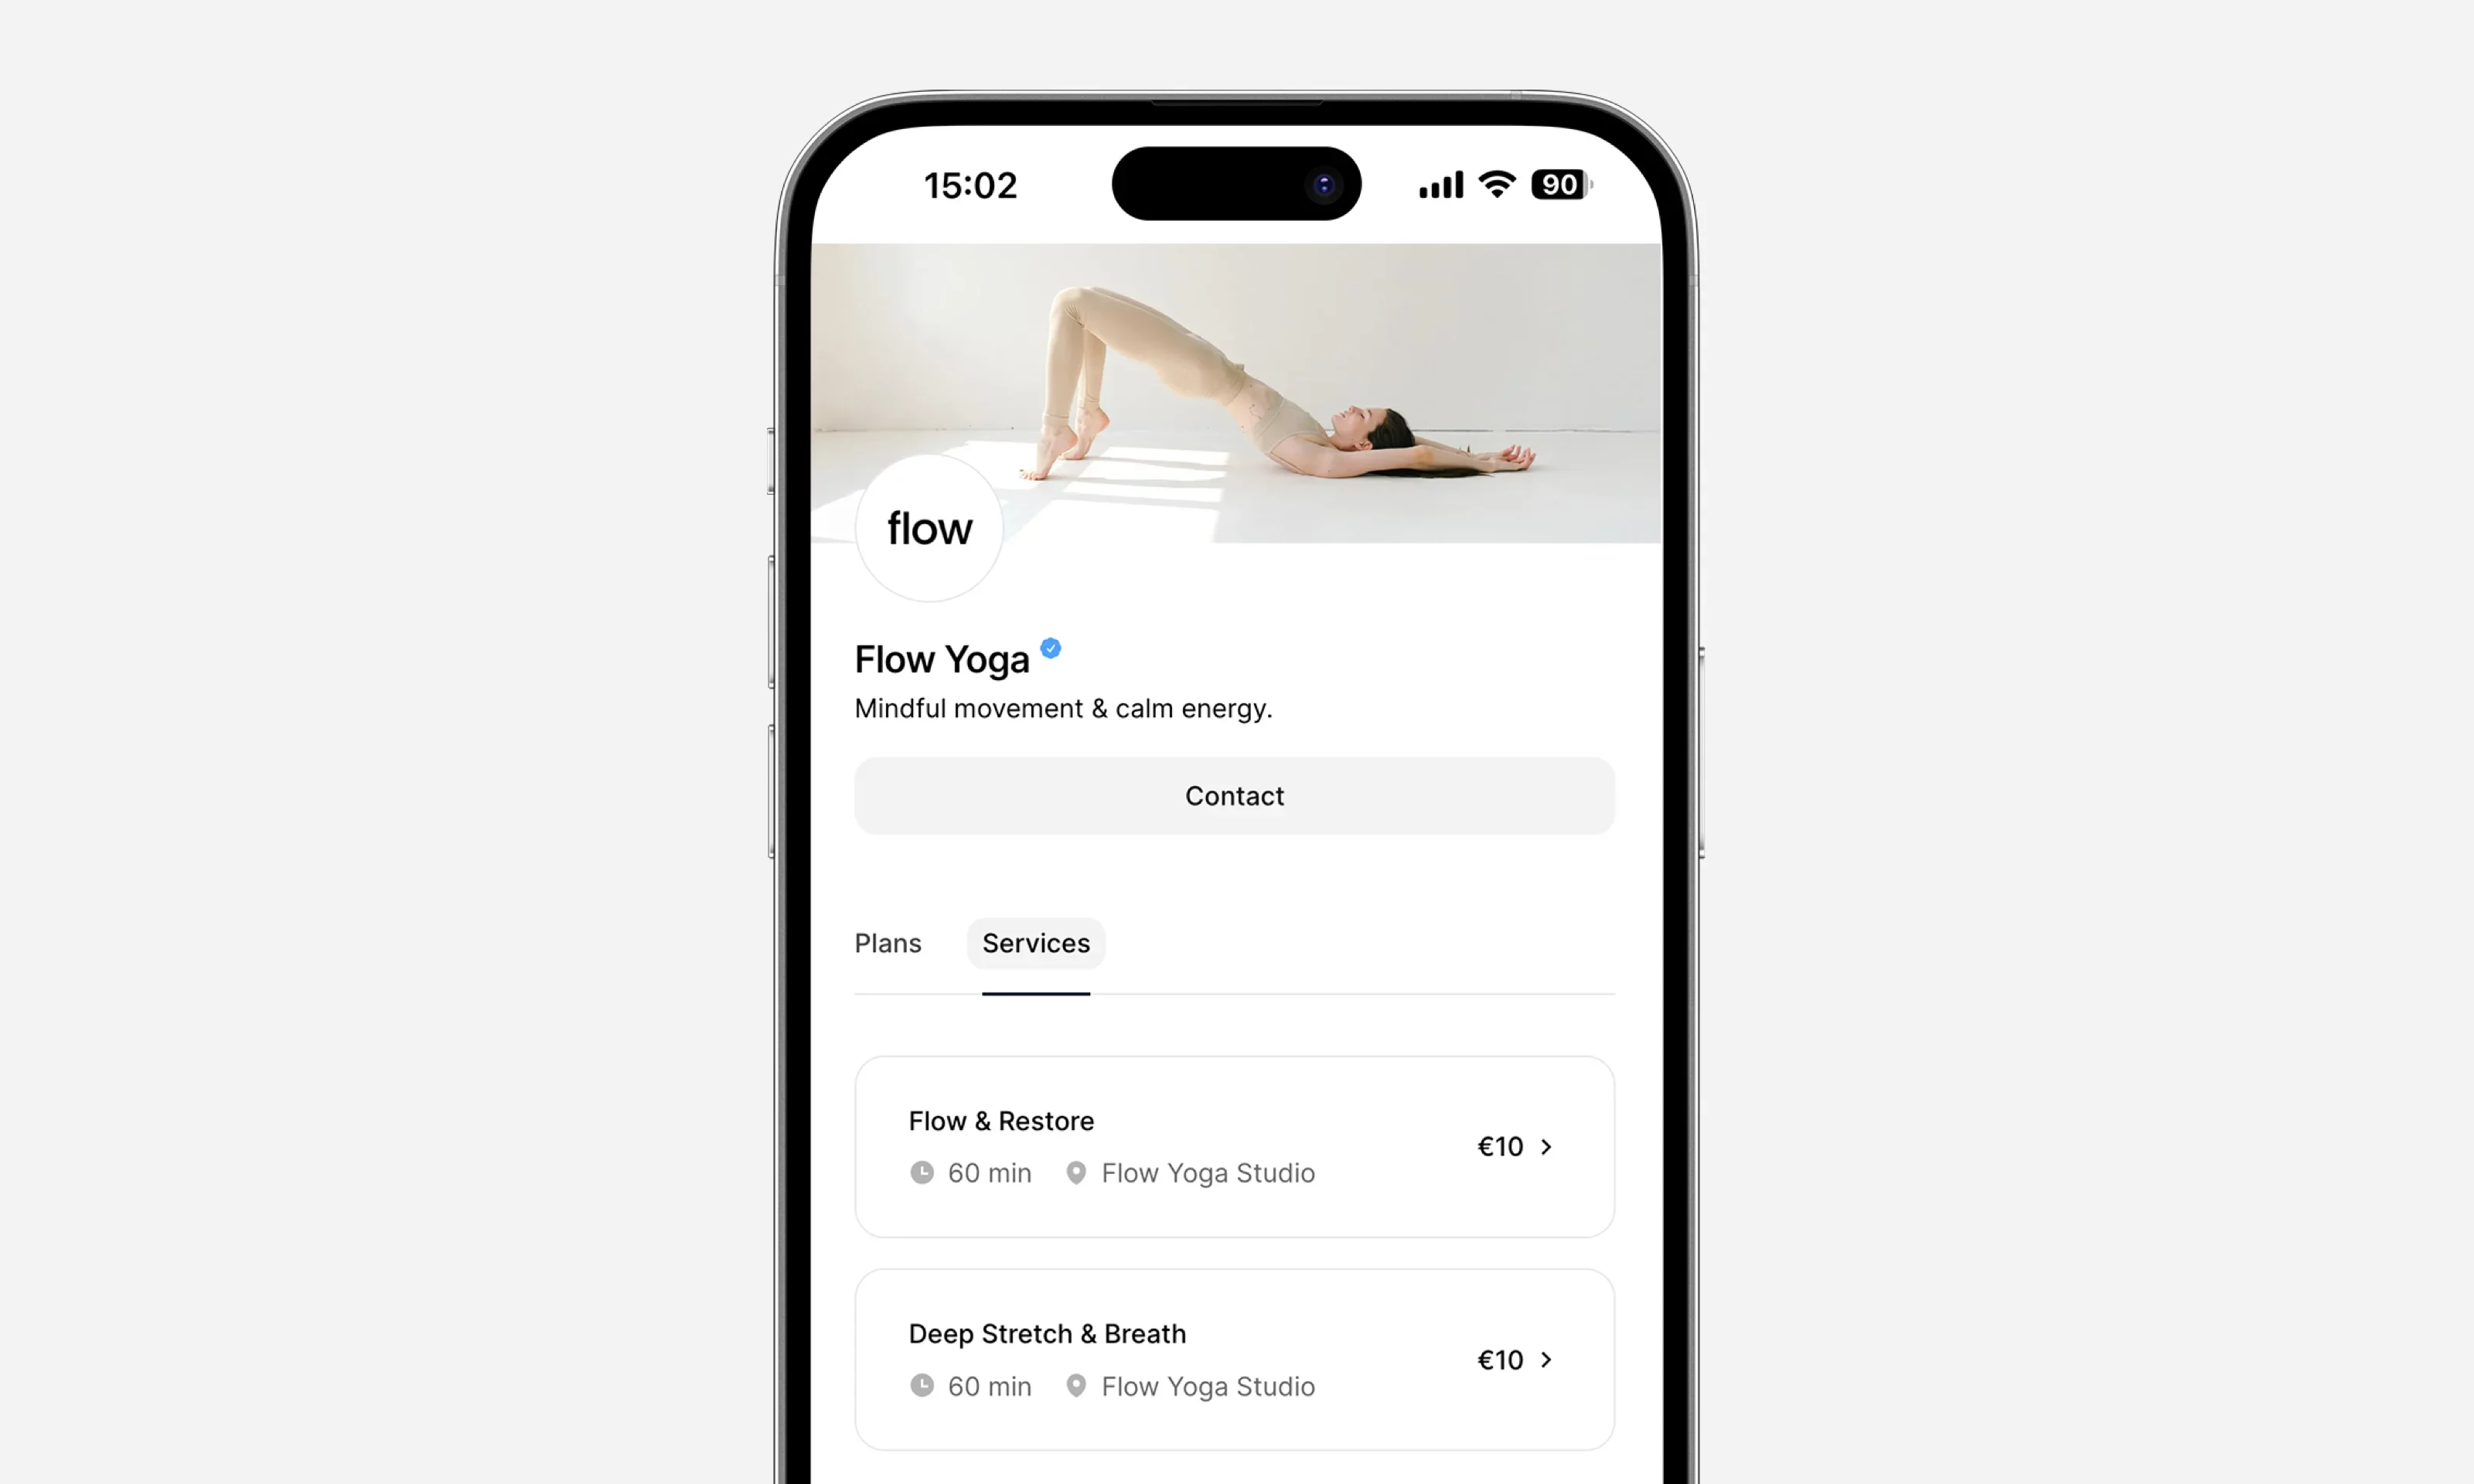
4. Add your services and class schedule
This is where you bring your yoga studio to life—by listing what you offer and when. Whether you teach daily flows, private sessions, or weekend workshops, you can add everything in just a few clicks.
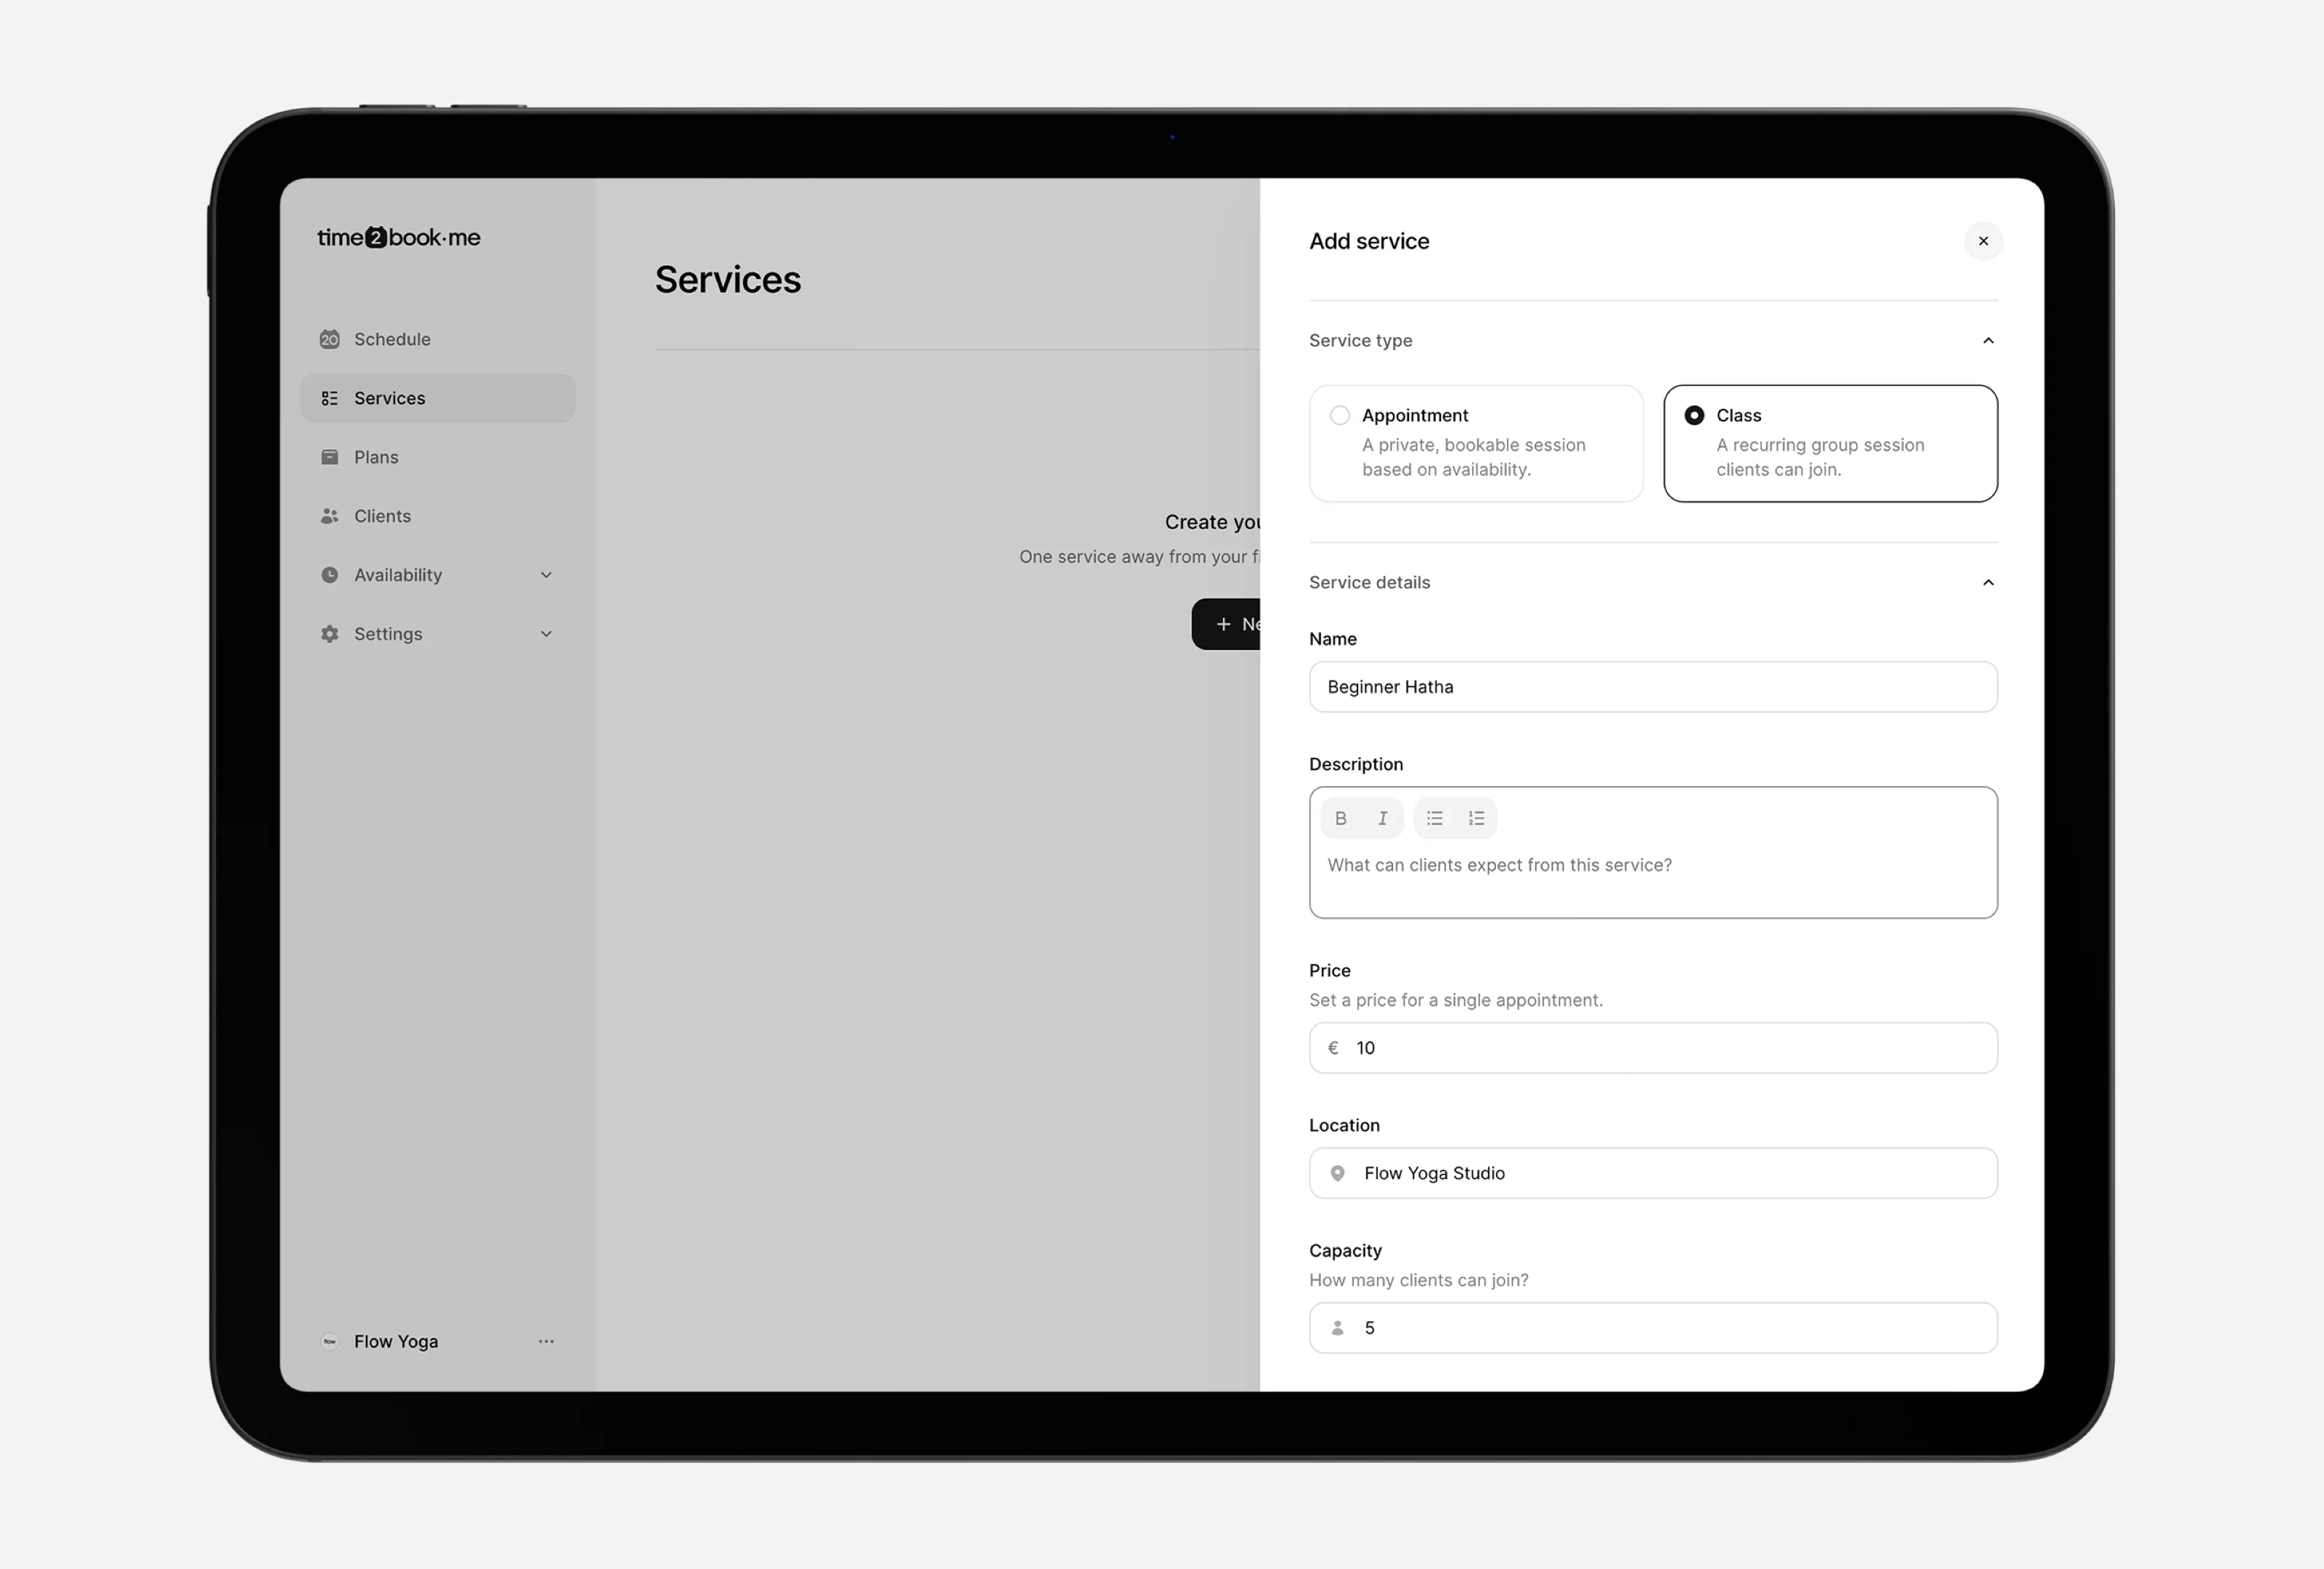
Start by adding your services:
Each service is a class type or offering. For example:
- Vinyasa Flow – 60 mins
- Beginner Hatha – 45 mins
- Private 1:1 Yoga Session – 60 mins
For each one, you’ll add:
- Name & short description
- Duration (in minutes)
- Maximum number of students
- Price (for a single session)
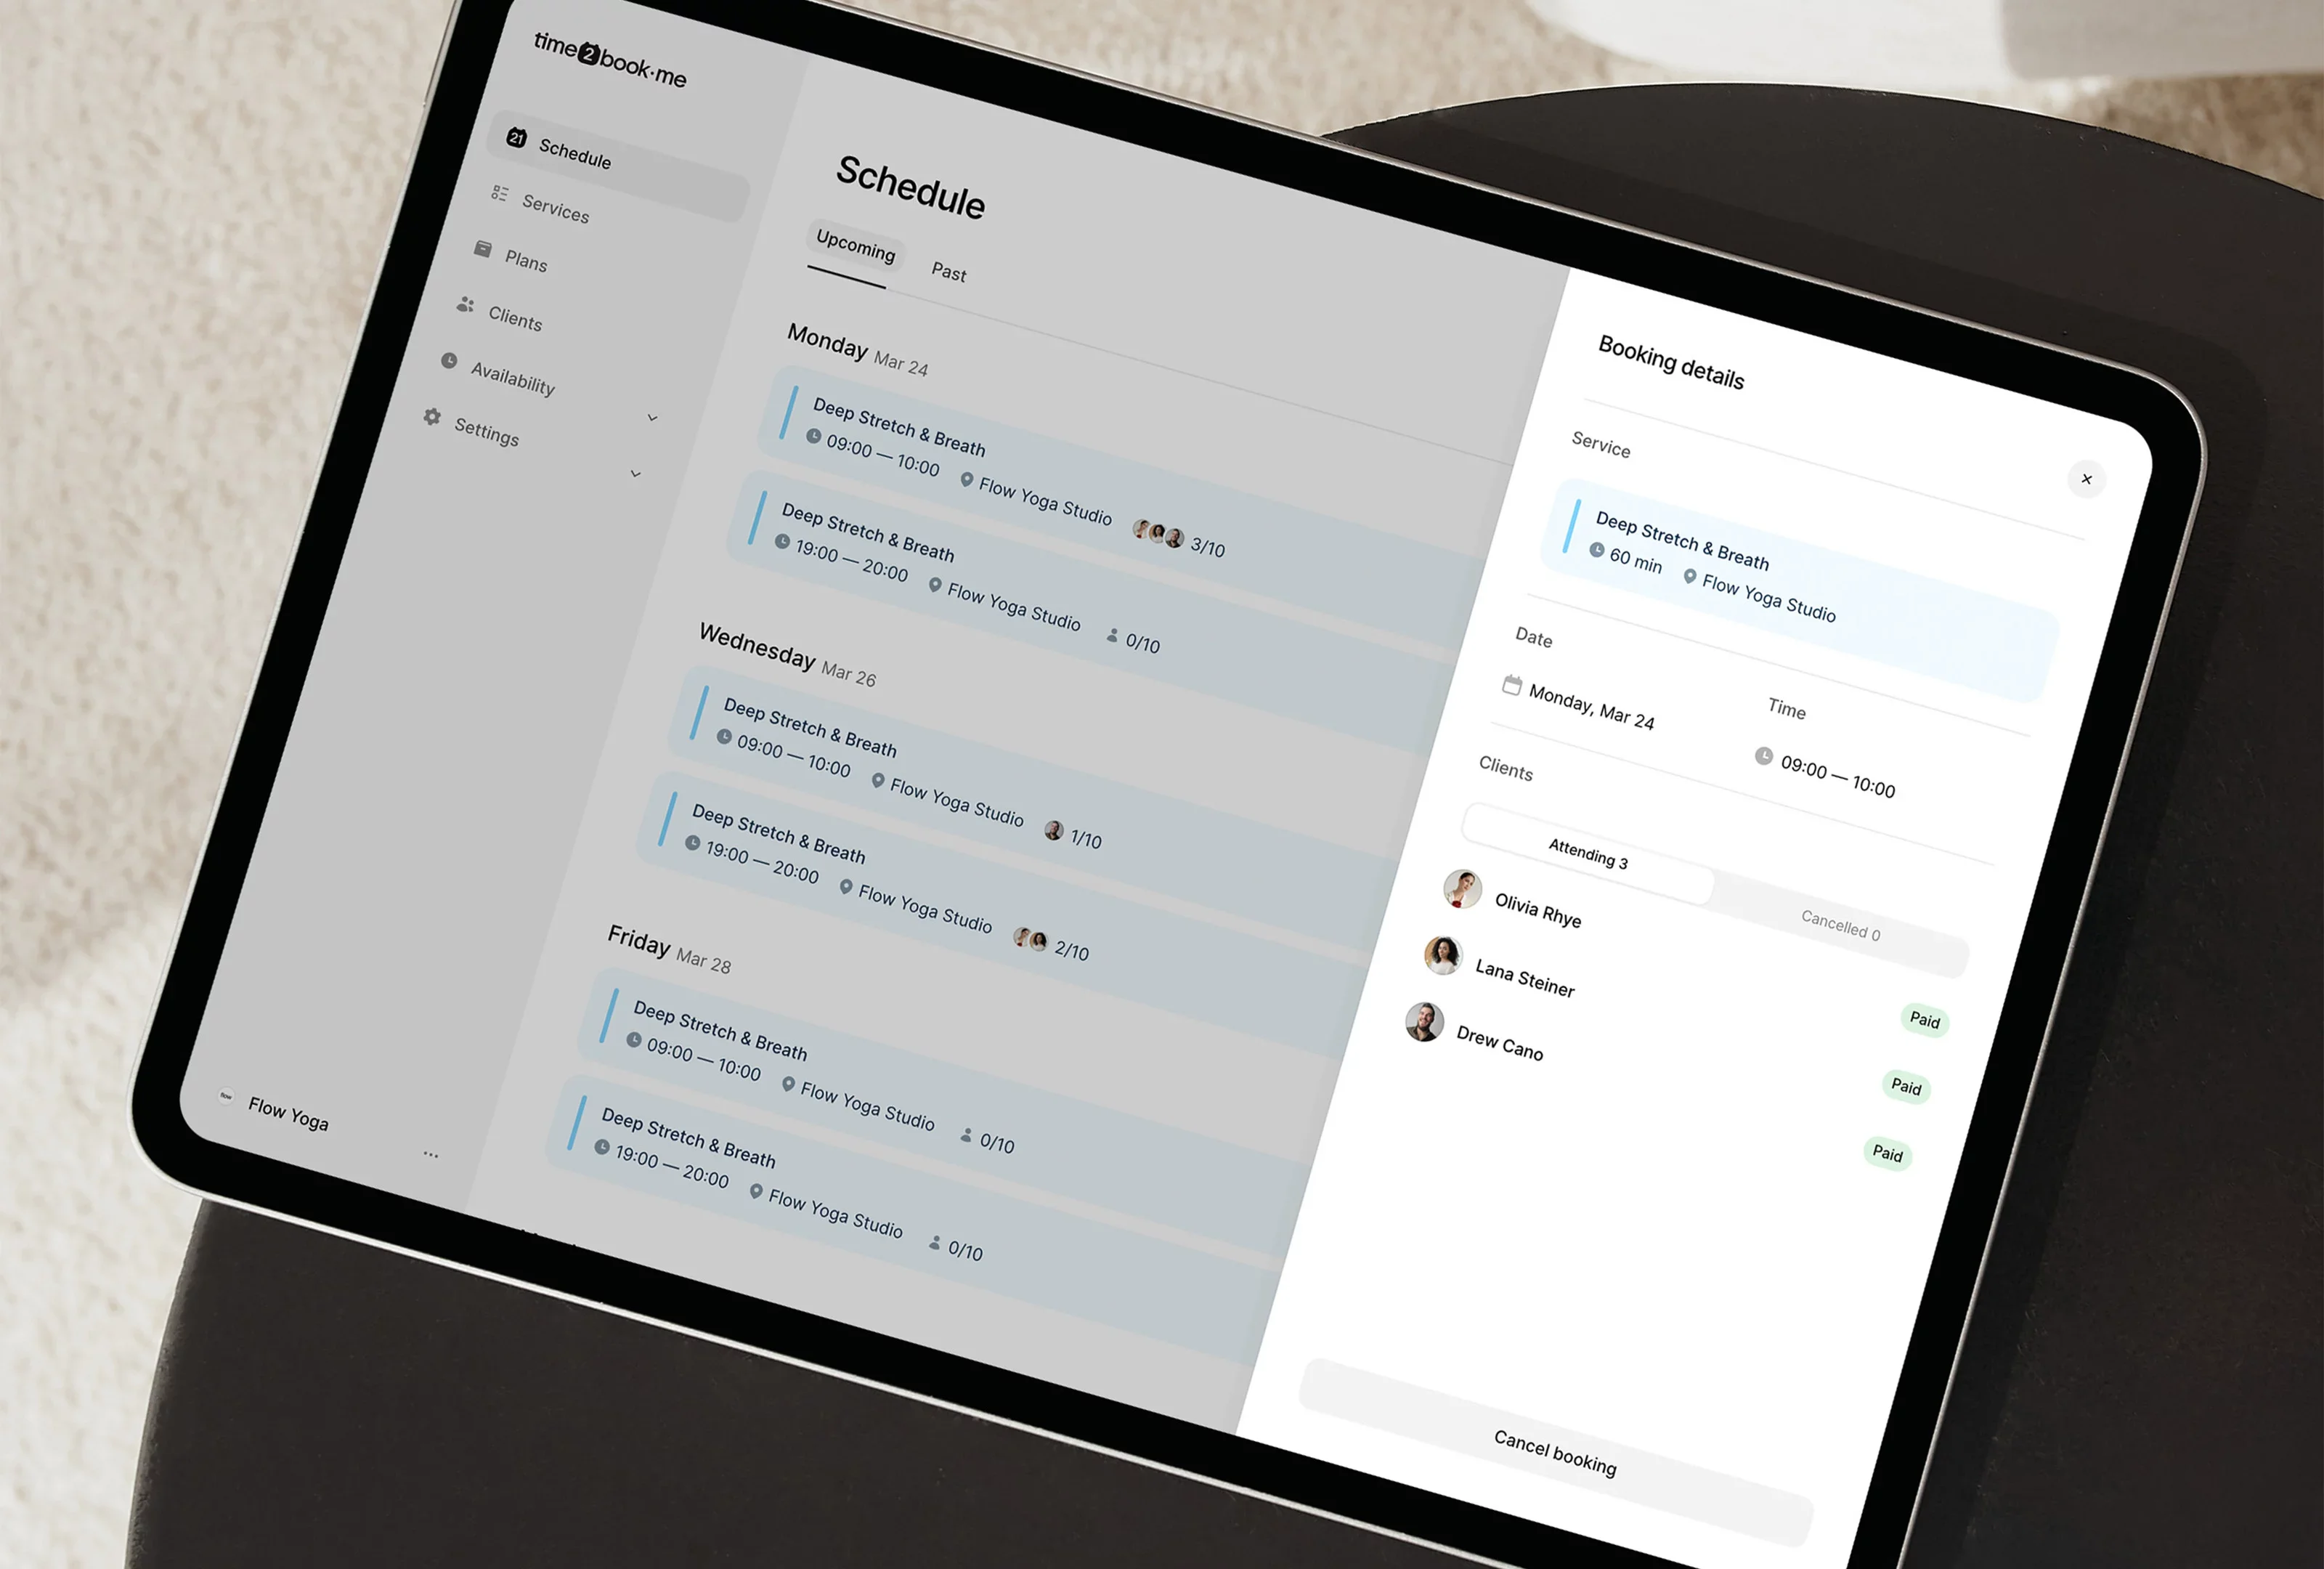
Then, add your class schedule:
You’ll define:
- Which days/times each class happens (e.g. Mondays at 6 PM)
- Whether it repeats weekly
- If bookings close before class starts (e.g. 1 hour prior)
Pro tip:
Start with your core weekly schedule. You can always add more later (like workshops or seasonal classes).
5. Set up pricing, class packs, and payment options
Now that your classes are scheduled, it’s time to decide how your students will pay—and set it up so it runs on autopilot.
You can offer as much flexibility as you want—drop-ins, multi-class packs, or recurring memberships. Best part? It’s all tracked and handled for you.
Here’s what you can set up:
Drop-in pricing
Great for one-time visitors or trial classes.
- Example: “Pay €15 to join this class”
- Paid upfront during booking
- Auto-confirmed after payment
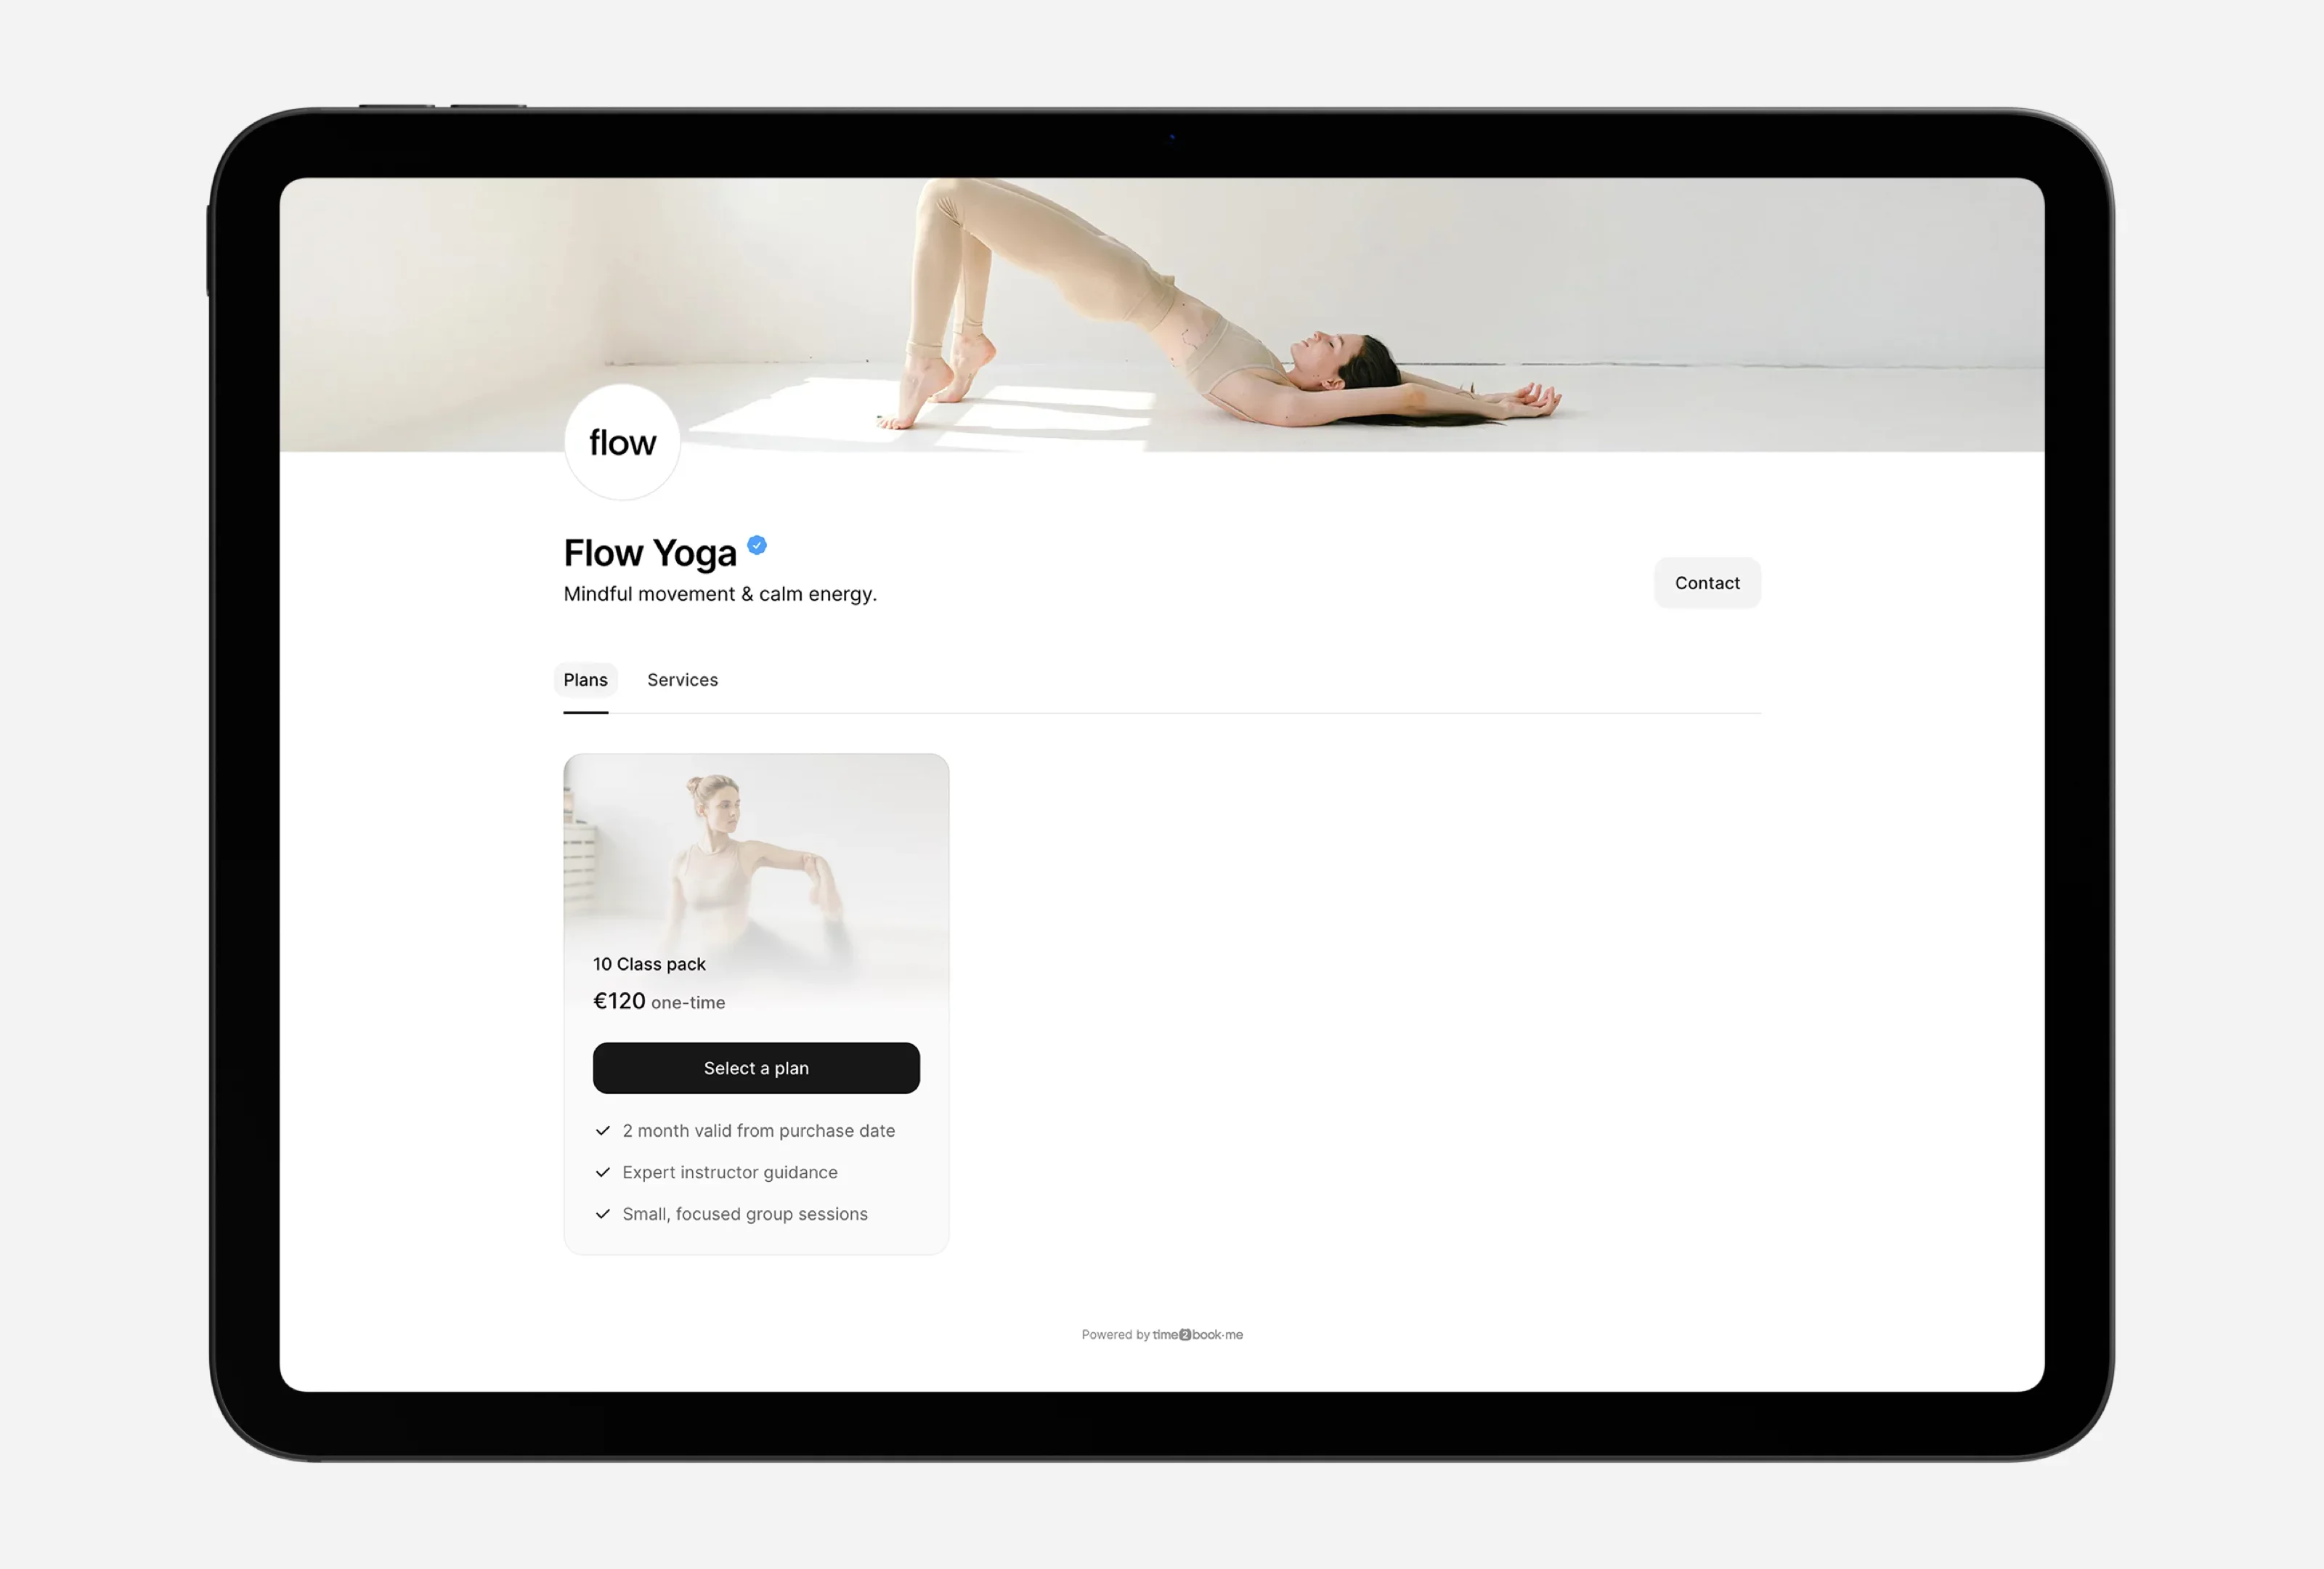
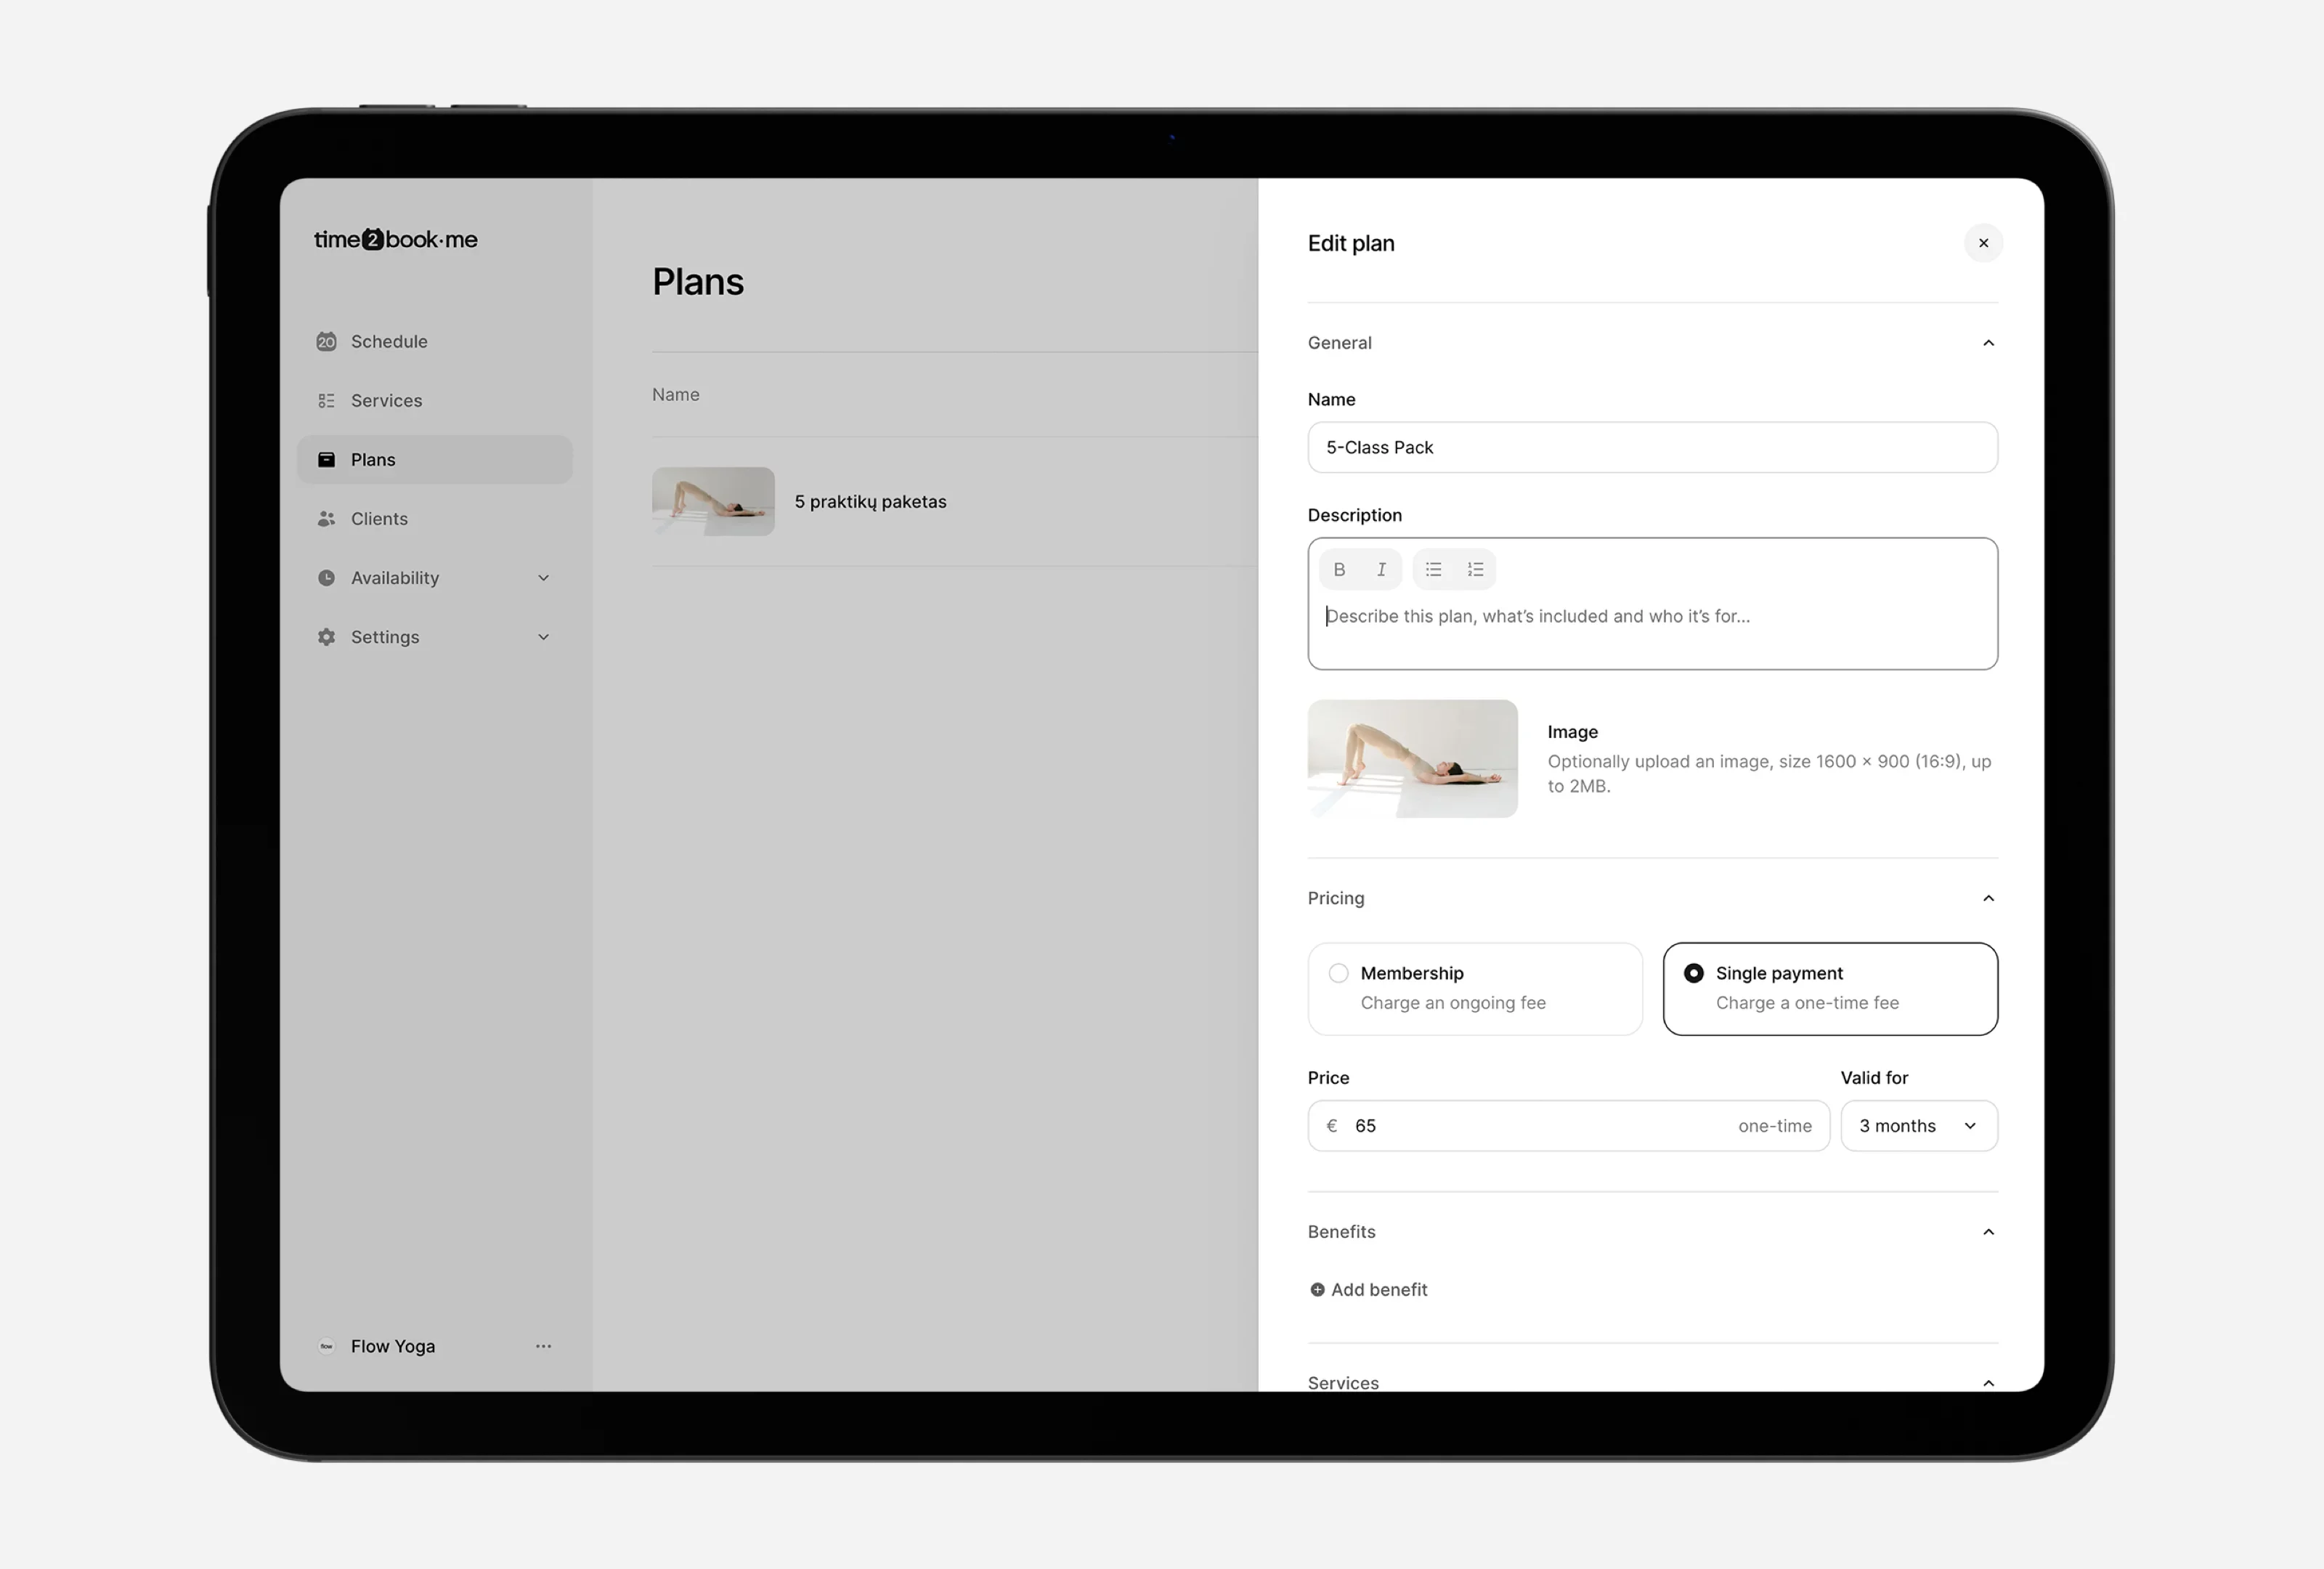
Class packs
Let students book multiple classes at a discount.
- Example: 5-Class Pack – €65 (valid for 2 months)
- Time2Book tracks how many classes are left
- Clients can book whenever it fits their schedule
Memberships (recurring)
Perfect for regular students.
- Example: Unlimited Monthly Yoga – €89/month
- Billed automatically every week or month
- Includes unlimited or limited bookings per period
Lastly, you’ll connect your Stripe account (if you haven’t already) to accept payments securely via credit card, Apple Pay, and more. It’s fast, safe, and only takes a couple of minutes.
Pro tip:
You can also set expiration dates for class packs or booking limits for memberships to protect your schedule and encourage consistent attendance.
6. Share your booking link everywhere
Once your booking system is live, it’s time to get students using it. Your booking link is the gateway to your yoga classes—it’s where clients choose a time, pay, and get auto-confirmed.
Time2Book gives you a clean, mobile-friendly public page with your logo, class list, and prices. You can start sharing it right away.
Where to share your booking link:
- Instagram bio
- Facebook page
- Google Business profile
- Your website (if you have one)
- Email newsletters
- Text messages or WhatsApp chats
Pro tip:
Save the link to your phone home screen and pin it to your social profiles. The easier it is to find, the more likely clients are to book on the spot.
FAQs about setting up online booking for your yoga studio
Thinking about switching to online booking but still have questions?We’ve got you covered. Here are some of the most common questions yoga studio owners ask when setting up online scheduling and payments for their classes.
No. With platforms like Time2Book, you get a shareable booking page—no website required. Just send the link or add it to your social profiles."}}">
Yes. You can accept credit card and digital wallet payments during the booking process. Payments are collected securely and automatically."}}">
You can list the location for each class—or mark it as “Online” with a Zoom link. Time2Book supports both in-person and virtual sessions."}}">
Yes, if you allow it. You can set how far in advance clients can cancel or reschedule and whether they lose a class credit for late changes."}}">
Still have questions? We’re here to help. If you need support setting up your booking system or have specific questions about managing your yoga studio with Time2Book, just contact us here. We’ll get back to you as soon as we can!
You’re ready—fully bookable in under 30 minutes
Setting up online booking for your yoga studio doesn’t have to be overwhelming or time-consuming.
With the right tool, you can:
- List your classes
- Accept payments
- Automate your schedule
- Free up your time to focus on what you love—teaching
Whether you're a solo yoga instructor or running a growing studio, having a smooth, automated booking system helps your business run better and feel more professional.
Ready to try it yourself?
Time2Book is built for yoga teachers and studios who want to keep things simple.No tech stress. No complicated setup. Just bookings, payments, and a calm calendar.
Start your free account now and get your yoga studio fully bookable today.
Yoga studio software
Learn more
Manage bookings and payments easier
Get a free 7-day trial
No credit card required